Water testing at home is one of the most practical ways to learn what is actually coming out of your tap, well, filter, refrigerator dispenser, or storage container. Many people assume that clear, cold, odor-free water must be safe, but appearance alone reveals very little about microbial contamination, dissolved metals, chemical residues, hardness, or treatment performance.
A proper home testing approach combines observation, screening tests, scientific interpretation, and, when needed, laboratory confirmation. For households that want better control over drinking water safety, taste, appliance protection, and public health decisions, home-based testing is an essential first step rather than a complete endpoint.
Whether you use a simple dip-strip home water test kit, a mail-in laboratory package, or a more advanced home lab water test setup with digital meters, the goal is the same: to perform a meaningful drinking water analysis that answers specific questions. Is the water acidic or corrosive? Are nitrate levels elevated? Is a filter still working? Is there evidence of bacterial contamination in a private well? Does a plumbing system contribute lead or copper? Good diy water testing starts by defining what you need to know, understanding what each test can and cannot tell you, and interpreting the results in the context of recognized health-based guidelines and water quality standards.
This complete scientific guide explains how to perform a reliable water quality check at home, what parameters matter most, how test methods differ, when results are trustworthy, and when professional sampling becomes necessary. If you are new to the topic, PureWaterAtlas also provides a broader overview of drinking water testing and analysis that complements the practical steps covered here.
What water testing at home really means
At its core, water testing at home means measuring physical, chemical, and sometimes microbiological indicators in a household water sample using consumer-accessible methods. These methods range from low-cost color strips to reagent drops, handheld electronic meters, incubator-based bacterial kits, and certified laboratory mail-in systems.
Not every test measures contamination directly. Some parameters are indicators rather than hazards themselves. For example, hardness does not usually threaten health, but it affects scale formation, soap efficiency, and appliance life. pH is not usually the main health concern in residential water, but low pH can increase pipe corrosion and raise the risk of lead or copper leaching from plumbing materials. Turbidity can interfere with disinfection and indicate suspended matter, but the particles themselves may or may not be dangerous. Understanding this distinction is central to meaningful home testing.
In scientific terms, household water quality can be divided into several broad categories:
- Microbiological quality: bacteria such as total coliforms and E. coli, and in some contexts viruses or protozoa, though home testing usually focuses on bacterial indicators.
- Inorganic chemistry: pH, alkalinity, hardness, nitrate, nitrite, chloride, fluoride, iron, manganese, arsenic, lead, copper, and other metals or ions.
- Organic contaminants: pesticides, solvents, fuel compounds, PFAS, and disinfection by-products; most of these require laboratory analysis.
- Physical and operational indicators: turbidity, conductivity, total dissolved solids, color, odor, and temperature.
For an organized starting point, the broader water testing category on PureWaterAtlas covers related methods, contaminants, and interpretation topics.
Why home drinking water testing matters
Testing matters because drinking water risk is not distributed evenly. Municipal tap water in regulated systems is routinely monitored, but water quality can still change between the treatment plant and the kitchen faucet. Aging service lines, home plumbing corrosion, fixture materials, premise stagnation, and building-specific conditions all influence the water people actually drink. Households on private wells face even greater responsibility because well owners are generally responsible for their own monitoring and maintenance.
According to the U.S. Environmental Protection Agency drinking water resources, public water systems are regulated under national standards, but private wells are not federally regulated in the same way. The CDC’s drinking water guidance also emphasizes that testing is important, especially for wells, contamination events, flooding, nearby septic systems, and unexplained illness patterns. At the global level, the World Health Organization drinking water fact sheet highlights microbiological and chemical hazards as major public health concerns. The USGS water resources information is particularly useful for understanding groundwater vulnerability, geologic influences, and regional contaminant patterns.
Home testing is especially valuable in the following situations:
- You use a private well, spring, cistern, or rainwater system.
- You moved into an older home with unknown plumbing materials.
- Your water has changed in taste, smell, color, or clarity.
- Your area has known nitrate, arsenic, radon, PFAS, or agricultural contamination concerns.
- You recently experienced flooding, plumbing repairs, pressure loss, or backflow events.
- You rely on point-of-use filters and want to confirm performance.
- An infant, pregnant person, immunocompromised person, or dialysis patient is in the household.
Even for consumers served by regulated municipal supplies, a household-level drinking water analysis can identify issues that utility compliance reports do not fully capture, such as lead from interior plumbing, stagnation-related metals, local bacterial growth in fixtures, or underperforming filters.
The science behind common water quality parameters
A strong home testing strategy begins with the science. Different contaminants behave differently in water, and the test you choose should match the chemistry or biology of the target.
pH
pH measures how acidic or basic water is on a logarithmic scale, usually from 0 to 14. Neutral water is around 7. Lower pH indicates greater acidity, while higher pH indicates alkalinity. Water with low pH can be more corrosive to metals, which may increase the release of lead, copper, iron, or zinc from pipes and fixtures. pH alone does not define safety, but it is a key operational variable.
Hardness and alkalinity
Hardness mainly reflects dissolved calcium and magnesium. It influences scale buildup in kettles, heaters, and pipes. Alkalinity reflects the water’s capacity to neutralize acid, often due to bicarbonate and carbonate ions. Together, pH, alkalinity, and hardness help determine scaling or corrosion tendencies. These are important for household systems, though not usually direct toxicity concerns.
Total dissolved solids and conductivity
Total dissolved solids, or TDS, estimates the mass of dissolved substances in water, usually in mg/L. Conductivity measures the water’s ability to carry electrical current and correlates with ion concentration. High TDS does not tell you which substances are present, only that many dissolved ions are. TDS is useful for tracking treatment performance, source changes, or mineral loading, but it is not a substitute for contaminant-specific testing.
Nitrate and nitrite
Nitrate contamination is one of the most important parameters for private wells, especially near agriculture, septic systems, or manure storage. Elevated nitrate can pose a serious risk to infants because it may contribute to methemoglobinemia, often called “blue baby syndrome.” Nitrite is usually tested alongside nitrate because it is related in the nitrogen cycle and can also be hazardous.
Lead and copper
Lead and copper usually enter drinking water from plumbing materials rather than the water source itself. Lead is a neurotoxic metal with no beneficial role in the body, and exposure should be minimized as much as possible. Copper is an essential nutrient but can cause gastrointestinal effects at elevated levels and is also a corrosion indicator. First-draw water samples are often most relevant for identifying plumbing-related metal leaching.
Iron and manganese
Iron and manganese are common in groundwater. They often cause staining, metallic taste, discolored laundry, and buildup in fixtures. They are usually more important aesthetically and operationally than toxicologically at typical household levels, but manganese can become a health concern when elevated enough, especially for sensitive populations and infants. These metals can also complicate treatment and bacterial growth in plumbing.
Chlorine and chloramine
Disinfectant residuals in municipal water help control microbial growth in the distribution system. Free chlorine and total chlorine tests can tell you whether disinfectant remains present after the water reaches your faucet. Low residual may be a concern for storage tanks or long plumbing runs, while excessively strong taste or odor may affect acceptability rather than safety.
Total coliforms and E. coli
These are microbiological indicator organisms. Total coliforms are a broad group of bacteria that indicate the sanitary integrity of the system. Their presence does not always mean illness-causing organisms are present, but it signals that contamination pathways may exist. E. coli is a stronger indicator of fecal contamination and a much more urgent concern. Home microbiology kits can screen for these bacteria, but false positives and false negatives are possible if sampling and incubation are not done correctly.
What you can and cannot detect with a home water test kit
A home water test kit is useful, but its capabilities depend entirely on the method. Many inexpensive kits are screening tools, not definitive diagnostic tools. That distinction matters.
What home kits usually do well
- pH
- Hardness
- Alkalinity
- Chlorine or chloramine
- Nitrate and nitrite
- Iron and manganese in some kits
- Copper in some kits
- TDS and conductivity with handheld meters
- Basic bacterial screening with incubated test vials or paddles
What home kits often do poorly or inconsistently
- Very low concentrations of lead
- Arsenic without careful procedure and good kit quality
- Pesticides and volatile organic compounds
- PFAS
- Disinfection by-products
- Precise microbiological identification
Some mail-in kits marketed as home tests are actually laboratory services, which is an important distinction. They may provide much higher analytical confidence than an in-home strip or cartridge method. If you want a side-by-side evaluation of formats and reliability, PureWaterAtlas has a practical comparison of DIY vs professional water testing.
Choosing the right test based on your water source
The most effective water testing at home approach depends on where your water comes from.
Municipal tap water
If your home is connected to a public water system, start by identifying household-specific concerns rather than trying to test every possible contaminant. Common priorities include:
- Lead and copper from plumbing
- Chlorine residual
- Hardness and scaling tendency
- TDS if you use reverse osmosis
- Bacterial screening after plumbing disruptions
You should also review your utility’s annual water quality report and compare it with what arrives at the tap. Households that want a broader framework for deciding whether tap water is acceptable can read how to know if your tap water is safe to drink.
Private wells
Private well owners should test more comprehensively and more regularly. Core parameters commonly include total coliforms, E. coli, nitrate, nitrite, pH, hardness, iron, manganese, and sometimes arsenic, fluoride, sulfate, chloride, and local contaminants of concern. Flooding, nearby septic issues, agricultural runoff, and geologic arsenic zones may justify expanded testing.
Filtered water
If you use a pitcher, faucet filter, under-sink carbon filter, reverse osmosis system, or whole-house system, testing should answer two questions: what contaminants are present before treatment, and how well is the filter reducing them after treatment? TDS meters are often used with reverse osmosis, but they do not assess microbiological quality or many organic contaminants. Carbon filters may improve taste and odor without affecting TDS significantly.
Stored water, cisterns, and emergency water
Stored water systems raise concerns about microbial regrowth, disinfectant decay, sediment, and contamination during handling. Test for disinfectant residual where appropriate, turbidity or visual cloudiness, and microbial indicators if there is any doubt about sanitary protection.
Types of home testing methods
There is no single best method for every household. The right test balances accuracy, cost, ease of use, and the seriousness of the decision you need to make.
Test strips
Test strips use reagent-impregnated pads that change color when exposed to water. They are fast and inexpensive and are common for pH, hardness, alkalinity, nitrate, nitrite, chlorine, and multiple-parameter screening panels. Their main limitations are color interpretation, cross-interference, lighting conditions, user timing, and lower precision.
Liquid reagent kits
These kits often involve adding drops or powders to a measured sample and matching the resulting color to a chart. They can be more precise than strips, particularly for aquarium-style chemistry adapted to potable water screening, but they still rely on careful technique.
Digital meters
Handheld meters are common for pH, conductivity, TDS, temperature, and sometimes dissolved oxygen or oxidation-reduction potential. Their reliability depends on calibration, probe condition, storage, and maintenance. A cheap uncalibrated meter can be less useful than a well-made colorimetric kit.
Microbiological screening kits
These may use nutrient media, color changes, fluorescent indicators, membrane filtration, or paddles that support bacterial growth after incubation. They can be useful for private wells and post-repair checks, but aseptic technique matters. Contamination from your hands, countertop, faucet aerator, or poor incubation control can distort the result.
Mail-in certified lab kits
These are often the most scientifically defensible “home” option because the user collects the sample at home but analysis is performed in a professional laboratory. They are particularly important for lead, arsenic, PFAS, volatile chemicals, and confirmation of microbiological concerns.
If you are comparing brands and formats, PureWaterAtlas also reviews the best water testing kits for different household needs.
How to prepare for a reliable home water quality check
A good water quality check begins before the sample touches the test vial. Most bad results come from poor sampling, contamination, misunderstanding of the target sample type, or failure to follow timing instructions.
Step 1: Define your question
Ask what you are trying to learn. Are you screening for general quality, checking a suspected problem, evaluating a filter, or monitoring a private well? Your question determines the sample type and test selection.
Step 2: Choose the sampling point
Different taps can yield different results. The kitchen cold-water tap is usually the most relevant point for drinking water. Avoid hot water taps for potable sampling because hot water can increase metal leaching and is not typically the intended source for drinking or cooking.
Step 3: Decide whether you need first-draw or flushed water
This is critical. A first-draw sample is collected after water has been sitting in the plumbing, often at least 6 hours, and is useful for lead and copper exposure screening. A flushed sample, collected after running the tap for a specified time, is more representative of water from the main line or well source. Mixing these approaches without intention can make results misleading.
Step 4: Use clean containers
Use the container supplied with the kit whenever possible. Never rinse a bottle that contains preservatives for lab analysis. For basic in-home tests, a clean container free of soap residue is essential.
Step 5: Remove faucet attachments when appropriate
Aerators, screens, and hoses can harbor debris and biofilm, especially for microbiological sampling. If the kit instructions recommend removing them, do so carefully.
Step 6: Control timing and temperature
Many reagents have strict reaction times. Some microbial tests require specific incubation ranges. Read the instructions fully before starting.
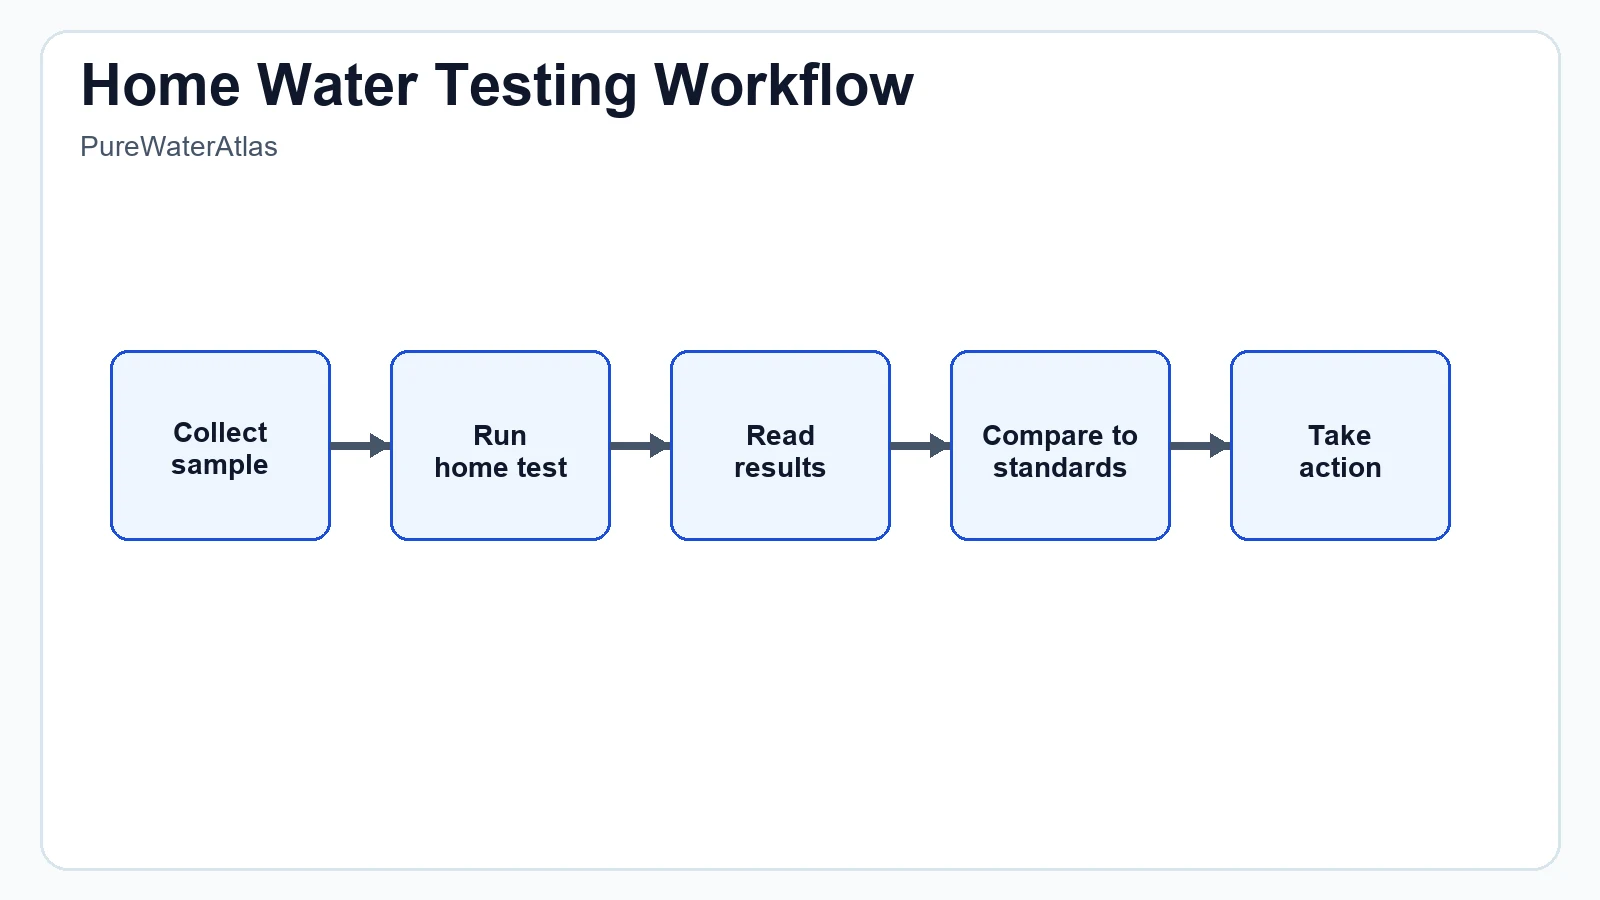
Step-by-step guide to water testing at home
The exact procedure depends on the kit, but the following workflow fits most household testing scenarios.
1. Gather materials
- Chosen test kit or meter
- Clean sample vessel
- Timer or stopwatch
- Disposable gloves for microbiological sampling if possible
- Notebook or phone for recording results
- Calibration solution if using a digital meter
2. Read all instructions before collecting water
This sounds obvious, but many tests fail because users improvise. Some strips require no rinsing; some vials must be filled to an exact line; some bacterial kits must not be opened after incubation.
3. Collect the correct sample
For a general chemistry screen, let the cold water run briefly if instructed and fill the sample container without splashing excessively. For first-draw metal testing, collect the first water out of the tap after stagnation. For microbial testing, avoid touching the inside of the container or cap.
4. Perform the test exactly as directed
Dip the strip for the stated time, add the exact number of reagent drops, or calibrate the meter first. Keep samples away from direct sunlight during color development unless instructed otherwise.
5. Read results at the specified time
Colorimetric tests often change as time passes. Reading too early or too late can change the apparent concentration substantially.
6. Record values and conditions
Write down the date, time, sampling point, whether the sample was first-draw or flushed, the test brand, lot number if available, and the result. Repeating this over time turns one-off measurements into useful trend data.
7. Repeat suspicious or borderline results
If the result is close to an action level, or if it seems inconsistent with your expectations, repeat the test with a fresh sample. Consistency matters more than a single number from a consumer kit.
How to interpret common home test results
Interpretation is where many households struggle. A measured value only becomes useful when compared with an appropriate benchmark, testing objective, and sampling context. PureWaterAtlas provides a deeper resource for understanding water test results, but the following principles are essential for home use.
| Parameter | What it may indicate | Why it matters | Typical action |
|---|---|---|---|
| pH | Acidity or alkalinity | Corrosion and treatment performance | Confirm if very low or very high; assess plumbing corrosion risk |
| Hardness | Calcium and magnesium | Scaling and soap inefficiency | Consider softening if operational problems exist |
| Nitrate | Agricultural or septic influence | Important infant health concern | Confirm elevated results with a lab and avoid use if levels are unsafe |
| Lead | Plumbing corrosion | Neurotoxic exposure concern | Use lab confirmation, flushing, filters, and plumbing assessment |
| Total coliforms | Sanitary integrity problem | Potential pathway for contamination | Resample, inspect source, disinfect if appropriate, confirm in lab |
| E. coli | Fecal contamination | Urgent health concern | Do not drink without effective treatment; seek confirmation and corrective action |
| TDS | Total ion load | Taste, mineralization, treatment tracking | Use as a trend indicator, not a safety diagnosis |
Use standards carefully
Some values are health-based, some are aesthetic, and some are treatment technique benchmarks. A number above a taste-based guideline is not the same as a number above a health-based maximum contaminant level. For context on how these benchmarks work, PureWaterAtlas explains water quality standards in clear practical terms.
Examples of useful distinctions include:
- Health-based contaminant limits: such as nitrate or microbial indicators, where action can be urgent.
- Action levels: such as lead in regulatory settings, where the framework is based on corrosion control and occurrence rather than a strict safe-versus-unsafe threshold.
- Secondary or aesthetic standards: such as iron, manganese, chloride, or TDS in some contexts, where taste, odor, staining, or appearance may drive action.
Common mistakes in diy water testing
DIY water testing is only as good as the sampling and interpretation behind it. The most common mistakes are avoidable.
- Testing hot water instead of cold water: hot water is not the standard sample for drinking water assessment.
- Using expired reagents: color chemistry degrades over time.
- Ignoring calibration: pH and conductivity meters drift.
- Misreading colors under poor lighting: compare strips in natural neutral light if possible.
- Using the wrong sample type: first-draw versus flushed water can completely change metal results.
- Contaminating microbiological samples: touching the inside of caps or bottles can cause false positives.
- Overinterpreting TDS: low TDS does not guarantee safety; high TDS does not identify the contaminant.
- Assuming one clean result means long-term safety: water quality can change seasonally or after plumbing disturbances.
When home testing is not enough
A home lab water test or consumer kit can be extremely useful, but there are clear situations where certified laboratory analysis is the better choice.
Use a laboratory when:
- You suspect lead, arsenic, PFAS, pesticides, or industrial solvents.
- You have a newborn or infant and nitrate is a concern.
- You have recurring bacterial positives in a well.
- You need results for property transactions, remediation, or formal documentation.
- A home screening test shows elevated or uncertain findings that could affect health decisions.
- You want to verify treatment system performance with defensible analytical data.
Professional analysis is not a rejection of water testing at home; it is the next scientific step when screening indicates a need for confirmation, quantification, or broader contaminant coverage.
Suggested testing schedules for households
Testing frequency depends on the water source, vulnerability, and whether conditions have changed.
For municipal water users
- Lead screening if the home has older plumbing, after plumbing changes, or if corrosion is suspected
- Annual or periodic chlorine, hardness, and general chemistry checks if relevant to filters or appliances
- Bacterial screening after repairs, contamination incidents, or prolonged vacancy
For private well owners
- At least annual bacterial testing for total coliforms and E. coli
- Periodic nitrate testing, especially in agricultural areas or where infants are present
- Full chemistry testing on a recurring schedule based on local risk, often every few years or sooner if conditions change
- Immediate retesting after flooding, casing damage, septic failure, or changes in taste, odor, or clarity
For households with treatment systems
- Check source water before installation
- Test treated water after installation to establish a baseline
- Retest at intervals based on filter type, manufacturer guidance, water use, and contaminant risk
Health and safety implications of abnormal results
Not every abnormal result is an emergency, but some deserve prompt response. The key is matching the parameter to the level of concern.
Microbiological contamination is among the most urgent, especially if E. coli is detected. Water with confirmed fecal contamination should not be consumed without effective treatment such as boiling or a verified disinfection process, depending on public health guidance and source type. For private wells, this usually triggers sanitary inspection, possible shock disinfection, and repeat testing.
Elevated nitrate is especially important for infants and pregnant households. If a screening result suggests nitrate above health-based guidance, confirm promptly with a lab and use an alternative safe water source while resolving the issue.
Lead findings require a measured but serious response. Because lead risk depends on concentration, exposure frequency, plumbing conditions, and population vulnerability, confirmation testing and source investigation are usually warranted. Flushing, certified filtration, and replacement of lead-containing components may be part of the solution.
Low pH and corrosive water do not necessarily harm health directly, but they can create conditions that mobilize metals. In such cases, the chemistry result is a warning sign about the plumbing system.
Aesthetic issues such as iron, manganese, sulfur odors, staining, or hardness may not represent acute toxicity, but they can affect acceptability, maintenance costs, and confidence in the water supply. They also sometimes coexist with more serious source problems.
Building a practical home testing strategy
The best household strategy is layered rather than random. A scientifically sound approach usually looks like this:
- Review your source type, local contamination history, plumbing age, and vulnerable household members.
- Start with a general screening panel that includes pH, hardness, alkalinity, chlorine if applicable, and nitrate for well users.
- Add targeted testing for lead, copper, iron, manganese, or bacteria based on specific risk.
- Record and compare results over time rather than treating each test as isolated.
- Use laboratory confirmation for health-significant or ambiguous findings.
- After any treatment intervention, retest to confirm that the solution actually works.
This is what turns home testing from a gadget purchase into an evidence-based drinking water management habit.
FAQ
Can I trust a home water test kit?
For screening common parameters such as pH, hardness, chlorine, nitrate, and basic bacterial indicators, many kits are useful if instructions are followed carefully. For contaminants like lead, arsenic, PFAS, and pesticides, laboratory confirmation is much more reliable.
What is the best water sample to test from my house?
For most drinking water checks, use the kitchen cold-water tap. For lead and copper, a first-draw sample after several hours of stagnation may be the most informative. For source water conditions, a flushed sample may be more relevant.
Does a low TDS reading mean my water is safe?
No. TDS only estimates the total concentration of dissolved ions. It does not identify bacteria, lead, pesticides, PFAS, or many other contaminants. It is useful as a general indicator, not a complete safety test.
How often should I do water testing at home?
Municipal users may test periodically or when conditions change. Private well owners should test regularly, with bacterial testing at least annually and additional chemistry based on local risk and household circumstances.
Should I test before or after my filter?
Ideally both. Testing before treatment shows what problem exists, and testing after treatment shows whether the device is reducing the target contaminants effectively.
Conclusion
Water testing at home is most useful when it is intentional, scientifically informed, and followed by appropriate action. A well-chosen home water test kit can reveal important information about pH, hardness, disinfectant residual, nitrate, metals, and possible bacterial contamination. But good results depend on proper sampling, realistic expectations about what each method can detect, and careful interpretation against relevant standards. For serious contaminants or uncertain findings, laboratory analysis remains the best way to confirm risk. Used wisely, home testing is a powerful tool for protecting drinking water quality, improving treatment decisions, and understanding what your household is really consuming every day.
Read the full guide: Water Testing Guide
Explore more in this category: Water Testing Articles