When people start asking whether their drinking water is truly safe, one of the first decisions they face is the core question behind diy vs professional water testing: should they buy a home kit and test the water themselves, or should they send samples to a certified laboratory? The answer is not always simple, because different contaminants behave differently, different methods have very different detection limits, and the stakes can range from minor nuisance issues like hardness or staining to serious health concerns such as lead, nitrate, arsenic, or microbial contamination. A useful water quality analysis must therefore match the testing method to the problem being investigated. In practice, DIY tests and professional lab tests are not direct substitutes in every situation. They serve different purposes, offer different levels of water analysis accuracy, and come with different strengths, limitations, and costs.
For homeowners, renters, landlords, schools, private well users, and anyone trying to evaluate tap water, understanding this difference matters. A low-cost strip test may be enough to screen for pH, hardness, or chlorine, but it may be insufficient for making decisions about infant safety, corrosion control, heavy metals, or bacterial contamination. By contrast, laboratory testing can provide more sensitive, more defensible, and more comprehensive data, but it takes more time and usually costs more. This article explains the science behind home vs lab water test choices, compares methods and performance, discusses health implications, and helps you decide when a DIY approach is reasonable and when professional testing is the smarter choice.
Why the DIY vs Professional Water Testing Decision Matters
Water can look, taste, and smell normal while still containing contaminants of concern. Some of the most important drinking water hazards are effectively invisible. Lead has no reliable taste or odor at levels that can still harm health. Nitrate is colorless and especially important in homes with private wells and infants. Arsenic may be present naturally in groundwater. Some bacteria can occur intermittently, meaning one sample may test clean while another reveals contamination after rainfall, plumbing work, flooding, or well maintenance issues.
Public water systems in many countries are regulated and monitored, but that does not eliminate the need for individual testing in all circumstances. Household plumbing can alter water quality between the treatment plant and the tap. Lead service lines, brass fixtures, corroding pipes, dead-end plumbing sections, storage tanks, and point-of-use devices can all affect the final water that people actually drink. Households using private wells are in an even more direct position: the well owner is typically responsible for monitoring and maintaining water quality. Regulatory protections that apply to municipal systems often do not apply in the same way to private wells.
Organizations such as the U.S. Environmental Protection Agency, the Centers for Disease Control and Prevention, the World Health Organization, and the U.S. Geological Survey all emphasize that water safety depends on source conditions, treatment effectiveness, infrastructure, and ongoing monitoring. In other words, testing is not just a technical exercise. It is one of the most direct ways to evaluate exposure risk.
If you are deciding whether to begin with a kit or go straight to a certified lab, a good first step is understanding the broader process described in this complete guide to water testing and analysis. That context helps explain why the choice of method has such a strong influence on what you can and cannot conclude from your results.
What Is DIY Water Testing?
DIY water testing generally refers to consumer tests designed for home use without specialized laboratory training. These products commonly include color-changing strips, reagent drops, test vials, mail-in kits with simplified collection materials, and handheld digital meters. The user typically collects water from a tap, follows instructions, and either reads the result visually or uses a simple device to display a measurement.
DIY tests are popular because they are fast, accessible, and relatively inexpensive. They can be useful for initial screening, routine monitoring of a known issue, or checking operational parameters in a home treatment system. For example, a homeowner with a reverse osmosis unit may use a TDS meter to see whether dissolved solids are trending upward, suggesting membrane performance changes. A household on chlorinated municipal water may use strips to verify the presence of residual disinfectant. A family with hard water may use hardness strips to decide whether a softener setting is working.
Common parameters often measured with DIY methods include:
- pH
- Hardness
- Alkalinity
- Free and total chlorine
- Nitrate or nitrite screening
- Iron or copper screening
- Total dissolved solids via conductivity-based meters
- Sometimes lead or bacteria, depending on kit design
However, not all DIY kits are equal. Some are broad screening kits that cover many parameters at once but sacrifice precision. Others target a single contaminant and may perform better when matched to a narrow purpose. Understanding the kit’s intended use is essential. Screening is not the same as diagnosis, and a “not detected” result on a consumer kit does not necessarily mean the contaminant is absent at all relevant concentrations.
Typical DIY Test Formats
Several home testing formats dominate the consumer market:
- Test strips: quick, inexpensive, easy to use, usually semi-quantitative rather than highly precise.
- Drop-count titration kits: often used for hardness, alkalinity, or chlorine, sometimes more reliable than simple strips when used correctly.
- Color-comparator kits: involve adding reagent and matching color to a chart; interpretation can be affected by lighting and user perception.
- Digital meters: useful for pH, conductivity, or TDS, though calibration and maintenance matter.
- Home bacterial presence/absence kits: can indicate possible microbial contamination, but often lack the specificity and confirmation of laboratory microbiology.
Consumers comparing products can benefit from practical overviews like these guides to the best water testing kits, especially when trying to distinguish broad home screening tools from kits that are better suited for specific concerns.
What Is Professional Water Testing?
Professional water testing usually refers to analysis performed by accredited or certified laboratories using validated methods, calibrated instrumentation, quality control procedures, trained personnel, and documented chain-of-custody practices when relevant. Professional testing may be arranged directly by a homeowner, through a local health department, via a county extension service, or through environmental consulting and water treatment companies.
Laboratory analysis can include both routine chemistry and more complex contaminant detection, such as:
- Lead, copper, arsenic, uranium, and other metals
- Nitrate, nitrite, sulfate, fluoride, chloride, and other ions
- Volatile organic compounds and pesticides
- Total coliforms and E. coli
- Radionuclides in some regions
- PFAS, where laboratories offer those methods
- General mineral and aesthetic water quality profiles
The major advantage of professional analysis is that it is designed to produce results that are more sensitive, more reproducible, and more actionable. Labs use established analytical methods such as ICP-MS for trace metals, ion chromatography for certain anions, membrane filtration or defined substrate methods for microbial indicators, and other standardized procedures depending on the target analyte. These methods generally include blanks, standards, controls, and instrument checks to support data quality.
Professional testing is especially important when decisions carry health, financial, legal, engineering, or compliance consequences. If you suspect lead exposure in a child’s drinking water, need to document water quality before installing treatment, want to assess a private well after flooding, or need to identify a contaminant at a low regulatory threshold, professional testing is usually the appropriate route.
The Science Behind Water Analysis Accuracy
The phrase water analysis accuracy is often used broadly, but in analytical science it involves several related concepts: accuracy, precision, sensitivity, specificity, detection limit, quantitation limit, repeatability, and susceptibility to interference. These concepts explain why a home vs lab water test comparison is more than just a matter of convenience.
Accuracy and Precision
Accuracy refers to how close a measured result is to the true value. Precision refers to how closely repeated measurements agree with one another. A home strip test may consistently produce similar color shades, but if its chemistry or reading scale is coarse, it may still not be very accurate at low concentrations. Laboratory methods are generally designed to improve both accuracy and precision through instrument calibration, standards, and quality assurance procedures.
Detection Limits
Some contaminants matter at very low concentrations. Lead, arsenic, and certain synthetic chemicals may be concerning at levels below the practical capability of simple consumer tests. A kit that reports broad categories such as 0, 10, 25, or 50 parts per billion may not provide enough resolution for meaningful risk management in all cases. Laboratory methods often achieve much lower detection limits and finer quantitation, allowing results to be compared more confidently to health-based guidance or regulatory values.
Interferences and Matrix Effects
Real water is chemically complex. Minerals, disinfectants, turbidity, color, organic matter, and even sample container conditions can affect results. A strip or color reagent may respond differently in highly mineralized well water than in treated municipal water. High iron can interfere with some reactions. Water color can make visual interpretation difficult. In labs, method validation and sample preparation help reduce these effects, though no method is entirely free from limitations.
User Error
DIY methods are often highly dependent on timing, sample volume, storage conditions, mixing technique, lighting, and whether instructions are followed exactly. Reading a strip five seconds too early or too late can change the result. Sampling from the wrong tap or after flushing when a first-draw lead sample is needed can invalidate the test for the intended purpose. Professional testing still depends on proper sampling, but the analytical stage is less vulnerable to consumer interpretation error.
If you want a clearer understanding of the underlying techniques, this explanation of water testing methods is useful for connecting practical choices with the scientific methods behind them.
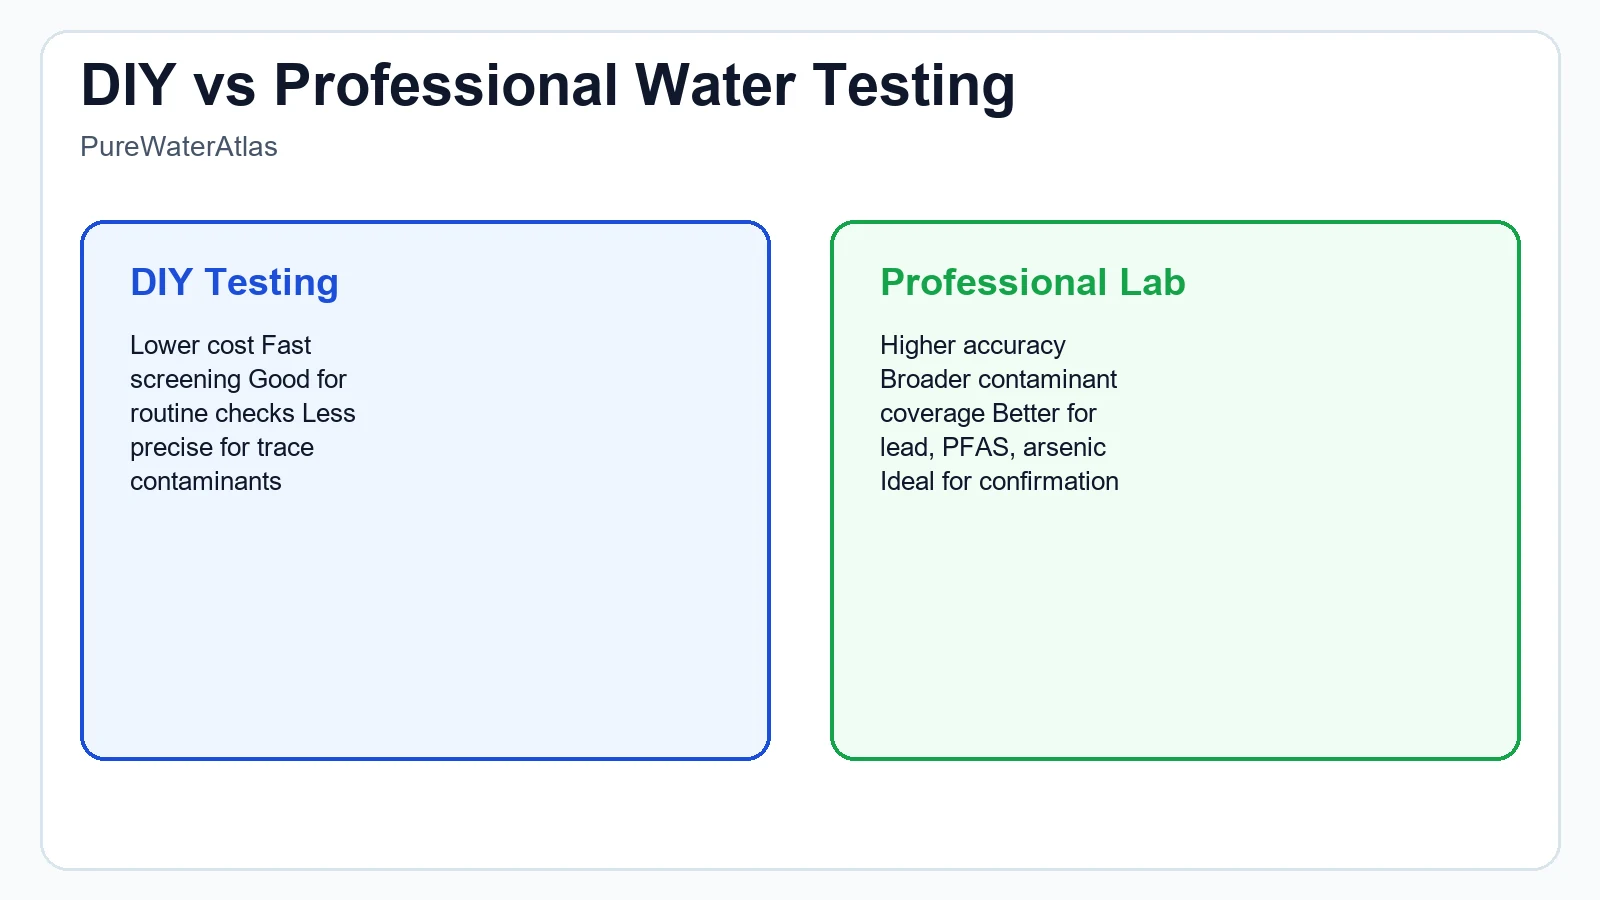
DIY vs Professional Water Testing: Head-to-Head Comparison
A direct water testing comparison is most helpful when framed by the question you are trying to answer. Are you checking whether your softener is functioning? Investigating a strange odor? Evaluating a child’s exposure to lead? Testing a private well for annual safety monitoring? Different goals require different levels of confidence.
| Factor | DIY Water Testing | Professional Laboratory Testing |
|---|---|---|
| Speed | Usually immediate to same day | Often days to weeks depending on panel |
| Cost | Low to moderate | Moderate to high |
| Ease of use | High, but instruction-dependent | Sampling may require care; analysis done by experts |
| Sensitivity | Often limited | Usually much higher |
| Precision | Variable | Generally better |
| Best for | Screening, routine checks, treatment monitoring | Health-critical contaminants, confirmation, broad profiles |
| Result interpretation | May be simplified or ambiguous | Usually more detailed and comparable to standards |
| Regulatory or formal use | Usually limited | Far more suitable |
Where DIY Testing Performs Well
- Routine hardness, pH, alkalinity, or chlorine checks
- Monitoring home treatment system performance between lab tests
- Quick screening after moving into a home
- Educational awareness of general water conditions
- Identifying whether further professional testing is warranted
Where Professional Testing Clearly Outperforms DIY Testing
- Lead, arsenic, uranium, and trace metals
- Nitrate when infant exposure is a concern
- Bacteria confirmation after flooding or well contamination events
- VOC, pesticide, PFAS, or industrial contamination concerns
- Any situation involving medical vulnerability, real estate disputes, or documented compliance needs
Water Testing Cost: Short-Term Savings vs Long-Term Value
Water testing cost is one reason many households begin with DIY tools. A simple strip kit may cost very little per test, while a broad professional panel can be significantly more expensive. But cost should be evaluated in relation to the consequence of a wrong answer.
A home screening kit can be cost-effective when the question is narrow and the tolerance for uncertainty is high. If you only want to know whether your softener is reducing hardness, a simple kit may be entirely adequate. But if you are trying to determine whether drinking water exceeds a threshold relevant to health, the cheapest test is not always the lowest-cost decision. A false negative can delay needed action. A false positive can lead to unnecessary treatment purchases, bottled water expenses, or anxiety.
Professional testing is more expensive partly because it includes sample handling, instrumentation, trained analysts, quality control materials, and reporting infrastructure. Those costs buy better data. In many households, the practical strategy is not “DIY or lab” but “DIY first, lab when needed.” That sequence can be economically rational if used carefully.
Typical cost patterns look like this:
- Low-cost DIY kits: useful for broad screening, but often limited in sensitivity and accuracy.
- Targeted home kits: moderate cost, better for specific issues, though still variable in performance.
- Basic laboratory panels: moderate cost for common chemistry or bacteria.
- Expanded laboratory panels: higher cost for metals, organics, PFAS, radionuclides, or specialized investigations.
In other words, cost should be judged alongside the question, the contaminant, the vulnerability of the people exposed, and the decision that will follow from the result.
Contaminant-by-Contaminant: Which Testing Approach Is Better?
Lead
For lead, professional testing is strongly preferred. Lead at the tap often comes from plumbing rather than the source water itself, which makes sampling technique critical. First-draw versus flushed sampling can produce very different results, and low-level detection matters. Consumer lead kits exist, but many are better viewed as rough screening tools than definitive measurements. If lead is the concern, laboratory analysis with proper sampling instructions is the more reliable choice.
Nitrate and Nitrite
Nitrate is especially important for private wells and households with formula-fed infants. Some DIY kits can screen for nitrate, but professional testing provides more confidence, especially if the result may determine whether water is safe for infant consumption. Given the health relevance of elevated nitrate, lab confirmation is advisable whenever home results are positive, borderline, or inconsistent.
Bacteria
Microbiological testing is an area where professional methods usually provide clearer answers. Presence/absence home kits can be useful alerts, but laboratory testing for total coliforms and E. coli is the standard approach when there is a real concern about fecal contamination, well integrity, septic influence, flooding, or illness investigation. Sample timing, sterile collection, temperature control, and holding time all matter.
Hardness, Alkalinity, and pH
DIY testing is often sufficient for these parameters, especially when the goal is treatment adjustment, scale management, or general understanding of water chemistry. Lab testing can provide more exact values, but many households do not need that level of detail for routine mineral balance questions.
Iron, Manganese, and Aesthetic Issues
If your concern is staining, metallic taste, black residue, or orange-brown deposits, a DIY kit can be a reasonable starting point. However, if you are spending money on a treatment system or trying to distinguish aesthetic nuisance from broader groundwater chemistry problems, a professional panel can be much more informative.
Arsenic and Other Trace Contaminants
Professional testing is the appropriate choice. Arsenic often requires sensitive methods and may be present without obvious sensory clues. The same is true for many trace inorganic and organic contaminants. DIY kits for these compounds generally cannot match laboratory sensitivity or confidence.
Total Dissolved Solids
TDS is often misunderstood. A handheld meter can measure conductivity-derived TDS quickly and cheaply, but that value does not identify specific contaminants or prove safety. High TDS can reflect benign minerals, while low TDS does not mean harmful substances are absent. DIY TDS measurement is useful operationally, but not as a stand-alone safety test.
Why Sampling Technique Can Matter More Than the Test Itself
Even the best laboratory method cannot rescue a poor sample. Sampling error is one of the biggest reasons water test results become misleading. This is true in both DIY and professional contexts, but it matters even more for contaminants with variable distribution in plumbing or intermittent contamination patterns.
Examples include:
- Lead: first-draw samples may be needed to capture stagnation effects.
- Bacteria: taps must be sampled carefully to avoid contamination during collection.
- Well water after storms: the timing of the sample relative to rainfall can affect detection.
- Chlorine: delay in testing can change the measured residual.
- VOC testing: sample containers and preservation are highly important.
Households testing their own taps should learn correct collection practices before relying on results. For beginners, this practical article on testing drinking water at home is helpful because it explains the basics of sampling and home test handling in a way that reduces common mistakes.
How to Interpret Results Without Overreacting or Underreacting
Test results only become useful when they are interpreted in context. A number by itself does not tell you whether action is needed, whether the result is reliable, or whether repeat sampling is appropriate. This is one reason laboratory reports, despite being more technical, are often more useful than simplified strip outcomes: they usually include units, detection limits, and contaminant-specific values that can be compared to standards or guidance.
Interpretation should consider:
- The contaminant measured
- The testing method used
- The sample location and sample type
- Whether the result is near a health-based threshold or just an aesthetic guideline
- Whether exposure is chronic or acute
- Who is consuming the water, including infants, pregnant people, or immunocompromised individuals
- Whether the result has been confirmed by repeat or laboratory testing
In the United States, some contaminant values are discussed using enforceable Maximum Contaminant Levels for public water systems, while others may involve action levels, treatment techniques, or non-enforceable secondary standards for taste, odor, staining, and cosmetic effects. These regulatory terms are useful reference points, but they do not automatically answer every household question, especially for private wells.
Many homeowners struggle most at the interpretation stage, which is why resources like this guide to understanding water test results can be valuable after either DIY screening or laboratory analysis. The central lesson is that results should be translated into decisions, not just collected.
Health and Safety Implications of Choosing the Wrong Testing Approach
The biggest risk in the diy vs professional water testing decision is mismatching the method to the hazard. When the stakes are low, that mismatch may only cause inconvenience. When the stakes are high, it can delay protection.
A few examples illustrate the point:
- A family relies on a simple lead strip that reads negative, but laboratory analysis would have shown elevated lead from brass fixtures or aging plumbing.
- A well owner uses a general mineral test kit and assumes the water is safe, while nitrate or bacterial contamination goes untested.
- A homeowner sees a high TDS reading and spends money on treatment for “unsafe water,” even though the issue is mostly hardness and not a direct health concern.
- A household uses a one-time DIY bacteria kit after flooding, gets an unclear result, and delays professional microbial analysis and well disinfection.
None of this means DIY testing is bad. It means that home tests should be used with a clear understanding of their role. They are often best as screening or monitoring tools, not as the only line of evidence for important health decisions.
If you are still at the stage of deciding whether your household should test in the first place, this overview of how to know if your tap water is safe to drink helps connect symptoms, source type, infrastructure factors, and testing priorities.
When DIY Testing Is a Good Choice
DIY testing is often a good choice when all of the following are true:
- You want fast preliminary information.
- The contaminant of interest is one that home kits can reasonably screen.
- The result will be used for basic awareness or routine monitoring, not a high-stakes decision.
- You are willing to follow instructions closely and understand the limitations.
- You are prepared to confirm suspicious or important results with a professional laboratory.
Good examples include checking hardness to adjust a softener, monitoring chlorine residual, screening pH before installing a neutralizer, or doing a broad preliminary scan after moving into a new home before ordering a more targeted lab panel.
When Professional Testing Is the Better Choice
Professional testing is the better choice when any of the following apply:
- You use a private well and need baseline or annual safety monitoring.
- You suspect lead, arsenic, nitrate, bacteria, PFAS, pesticides, or industrial contamination.
- You have infants, pregnant household members, elderly residents, or immunocompromised people at home.
- There has been flooding, nearby construction, well damage, septic failure, or a sudden water quality change.
- You need reliable results before buying treatment equipment.
- You need documentation for property transactions, disputes, or formal reporting.
In these cases, the improved sensitivity and defensibility of laboratory testing generally outweigh the additional cost and waiting time.
A Practical Decision Framework for Homeowners
The simplest way to approach water testing comparison is to ask five questions:
1. What exactly am I worried about?
Cloudiness, a rotten egg smell, scale buildup, infant safety, known regional arsenic, old plumbing, or recent flooding all point toward different testing priorities.
2. How serious would it be if the test missed something?
If the consequence is mostly nuisance, DIY may be enough. If the consequence involves health risk, move toward professional analysis.
3. Do I need a screening result or a decision-quality result?
Screening helps you decide what to investigate next. Decision-quality data helps you choose treatment, change water use, or document safety concerns.
4. Am I testing the right sample in the right way?
A perfect method on the wrong sample can still produce the wrong conclusion.
5. Will I understand what the result means?
Choose a method whose output you can interpret, or one supported by professional guidance.
For many households, the best strategy is layered:
- Start with a targeted DIY screen for basic parameters or operational checks.
- Use professional lab testing for contaminants with meaningful health implications or uncertain home results.
- Repeat testing as needed based on source type, changes in water quality, or treatment system performance.
Common Mistakes in Home vs Lab Water Test Decisions
- Assuming clear, good-tasting water is safe.
- Assuming one broad DIY kit can detect every important contaminant.
- Using TDS as a proxy for safety.
- Ignoring sampling instructions.
- Relying on a single negative home result to rule out intermittent contamination.
- Failing to confirm a concerning home result with professional analysis.
- Buying treatment equipment before identifying the actual contaminant problem.
FAQ
Is a DIY water test accurate enough for drinking water safety?
Sometimes, but it depends on the contaminant. DIY tests can be useful for screening pH, hardness, chlorine, or general water conditions. They are less reliable for high-stakes contaminants such as lead, arsenic, some bacteria, and trace pollutants where low detection limits matter.
What is the main difference between a home vs lab water test?
The main difference is data quality and scope. Home tests are faster and cheaper but usually less sensitive and less precise. Lab tests use validated methods and are better for contaminants that require accurate quantitation or formal interpretation.
Is professional water testing worth the cost?
Yes, especially for private wells, old plumbing, contamination concerns, infant safety, or before investing in treatment systems. Higher water testing cost often buys more reliable and actionable information.
Should I do both DIY and professional testing?
Often yes. A DIY test can be a useful first screen or routine monitoring tool, while professional testing can confirm findings and evaluate contaminants that home kits cannot assess well.
How often should drinking water be tested?
That depends on the water source, local risk factors, and the contaminant of interest. Private well owners often need periodic testing, while municipal water users may test when plumbing, taste, odor, discoloration, or source-specific concerns arise.
Conclusion
The real answer to diy vs professional water testing is not that one method is universally better than the other. It is that each has an appropriate role. DIY tests are valuable for convenience, affordability, screening, and routine monitoring of certain common parameters. Professional laboratory tests are the stronger choice when health protection, low-level contaminants, regulatory relevance, or treatment decisions are involved. The best approach is to match the testing method to the contaminant, the exposure risk, and the decision you need to make. When used this way, DIY and professional testing are not competing options so much as complementary tools in responsible drinking water quality analysis.
Featured image: Photo by RephiLe water on Pexels.
Read the full guide: Water Testing Guide
Explore more in this category: Water Testing Articles