
For homeowners who rely on a private well, water quality is not something managed continuously by a municipal utility. The responsibility for routine monitoring, contamination prevention, and follow-up testing usually rests with the well owner. That is why a clear, science-based well water testing checklist is one of the most practical tools for protecting household drinking water. Effective well water testing helps identify bacteria, nitrates, metals, minerals, and other contaminants that may affect safety, taste, plumbing, or long-term health. A structured approach also reduces guesswork: you know what to test, when to test it, how to collect samples properly, and what to do if the results show a problem.
Private wells draw from groundwater, and groundwater quality can change over time. Rainfall, drought, nearby septic systems, agricultural runoff, bedrock geology, flooding, construction, corrosion, and well age all influence what ends up in the water coming from the tap. Because many contaminants are invisible, odorless, and tasteless, clear water should never be assumed to be safe water. Agencies such as the U.S. Environmental Protection Agency, the Centers for Disease Control and Prevention, and the World Health Organization all emphasize the importance of monitoring drinking water quality and understanding the health significance of microbial and chemical contamination.
This article provides a detailed homeowner checklist for private well water safety. It covers the science of groundwater quality, core parameters to test, when to test, how to sample correctly, how to interpret common laboratory results, and what actions to take when a well contamination test finds a problem. The goal is not just to list items, but to explain why each step matters so homeowners can make informed decisions about water safety wells depend on every day.
What Well Water Testing Means for Homeowners
Well water testing is the process of evaluating a private well’s water for microbiological, chemical, and physical characteristics that affect health, usability, and infrastructure. In practice, testing can range from annual screening for coliform bacteria and nitrates to broader well water analysis panels that include pH, hardness, iron, manganese, arsenic, lead, fluoride, sulfate, sodium, uranium, pesticides, volatile organic compounds, and other location-specific contaminants.
Unlike public water systems, private wells are generally not subject to the same routine federal compliance monitoring under the Safe Drinking Water Act. That does not mean private well water is unsafe by default; many wells provide excellent drinking water for decades. It does mean the homeowner must be proactive. If you are new to this topic, a broader overview of how to test drinking water can help place well-specific testing into the larger context of household water quality.
A strong testing program answers five practical questions:
- Is the water microbiologically safe to drink?
- Are there chemicals present at concentrations of health concern?
- Are minerals or metals causing taste, odor, staining, or scaling?
- Has water quality changed since the last test?
- Does the well or plumbing system need maintenance, disinfection, or treatment?
The key point is that testing is not a one-time event. Groundwater chemistry is dynamic, and conditions around the well can change. A single clean result does not guarantee future safety.
Why Testing Matters for Drinking Water Safety
Groundwater often benefits from natural filtration as it moves through soil and rock, but this protection is not absolute. Cracks in bedrock, shallow aquifers, improper well construction, damaged well caps, flood events, and nearby contamination sources can allow pollutants to reach the well. Some hazards are acute and microbiological, such as fecal contamination after heavy rain or septic failure. Others are chronic and chemical, such as arsenic from local geology or nitrate from fertilizer and manure infiltration.
From a public health perspective, different contaminants raise different concerns:
- Microbial contamination can cause gastrointestinal illness and may indicate the presence of pathogens from human or animal waste.
- Nitrate is especially important for infants and pregnant households to monitor because elevated nitrate in drinking water is associated with methemoglobinemia risk in infants.
- Arsenic, lead, uranium, and other metals can present long-term health concerns depending on concentration and exposure duration.
- pH, hardness, iron, manganese, and corrosivity can damage plumbing, reduce appliance life, and influence whether metals leach from pipes or fixtures.
- Pesticides, solvents, and fuel-related chemicals may occur near agricultural, industrial, or storage areas and can require targeted groundwater testing.
Because contamination often has no obvious sensory warning signs, laboratory testing is central to evidence-based decision-making. For homeowners comparing private supplies with utility water issues, this guide on how to know if your tap water is safe to drink adds useful perspective on general drinking water risk assessment.
The Scientific Background: How Groundwater Becomes Contaminated
Understanding how contaminants reach a well makes testing more strategic. Groundwater is part of the hydrologic cycle. Rain and snowmelt infiltrate soil, move downward through unsaturated zones, and eventually recharge aquifers. During this movement, water can dissolve minerals, pick up nutrients, transport microorganisms, or carry synthetic chemicals. The hydrogeology of the site determines what enters the aquifer and how quickly it moves.
Natural geologic sources
Some contaminants originate from the earth materials surrounding the aquifer. Arsenic, fluoride, uranium, radon, iron, manganese, sulfur compounds, and hardness minerals can all occur naturally depending on local rock and sediment chemistry. In these cases, contamination is not caused by a spill or a failing septic field; it is a geochemical property of the groundwater source itself.
Surface and near-surface contamination
Human activities can introduce contaminants into recharge areas. Common examples include:
- Septic systems releasing bacteria, viruses, nitrates, and household chemicals
- Agricultural fertilizers contributing nitrate
- Animal operations contributing microbial contamination and nutrients
- Pesticide application in agricultural or residential settings
- Leaking underground fuel tanks or chemical storage
- Road salt increasing sodium and chloride
- Construction and land disturbance altering flow pathways
Well integrity and plumbing effects
Not all contamination originates in the aquifer. Sometimes the well structure or household plumbing is the problem. A cracked well casing, missing sanitary seal, damaged cap, or poor surface drainage can let contaminated water flow directly into the well. Corrosive water can also leach copper, lead, or other metals from plumbing components, creating indoor water quality issues even when raw groundwater is relatively clean.
The U.S. Geological Survey provides extensive scientific information on aquifers, groundwater flow, and water quality patterns, which helps explain why two neighboring wells can produce very different results.
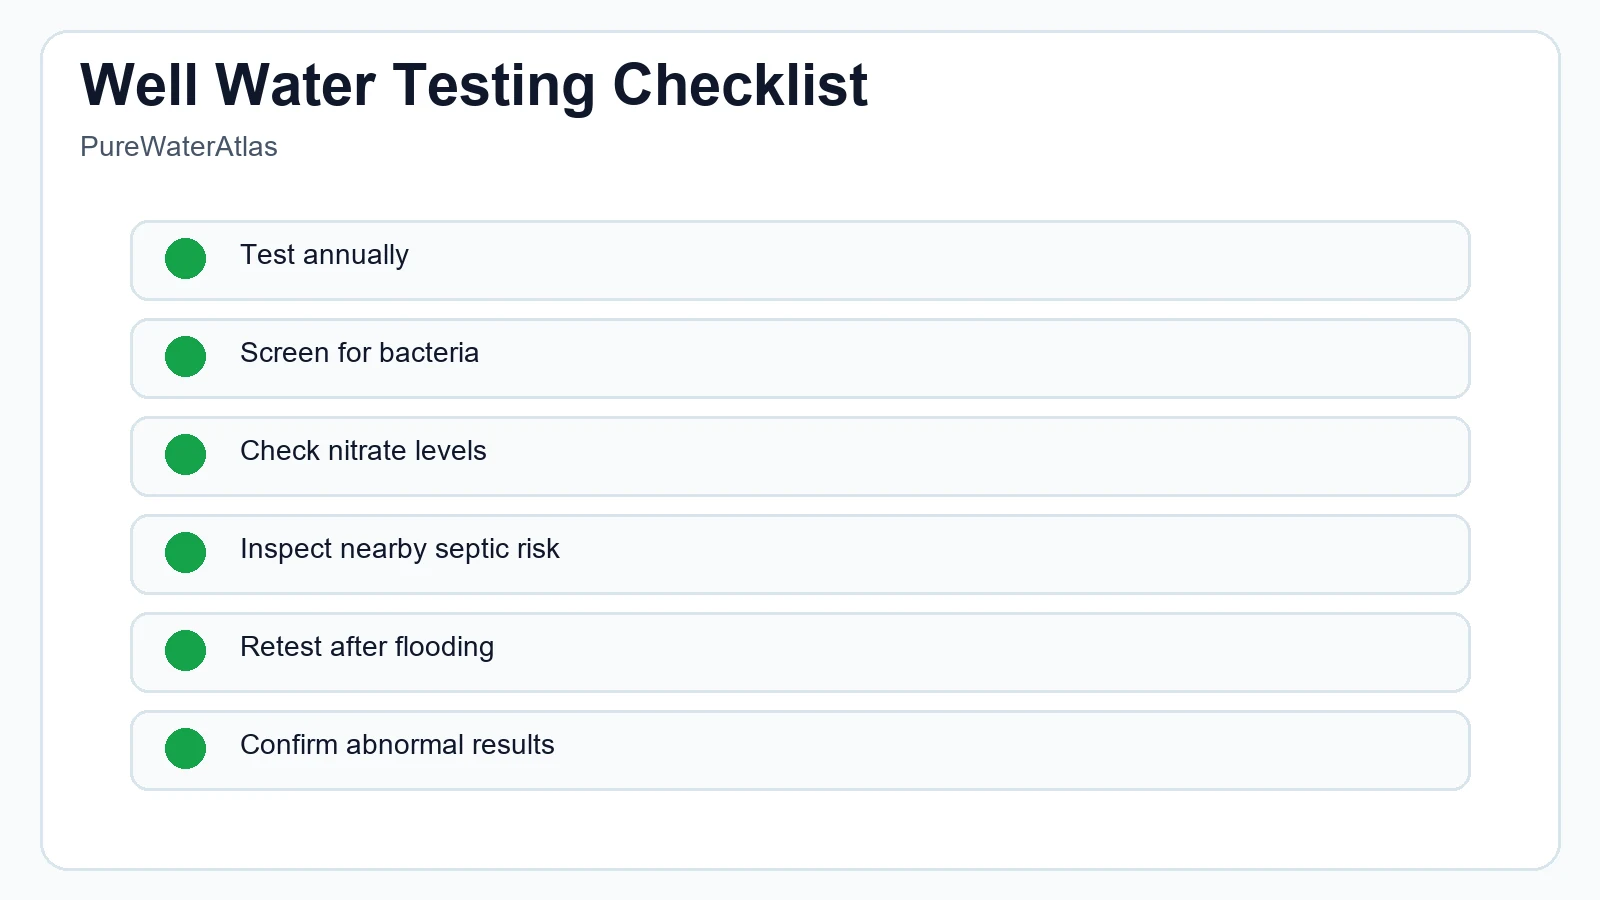
Well Water Testing Checklist for Homeowners
The checklist below is designed as a practical framework. Some items apply to every well owner, while others depend on local geology, land use, recent weather, plumbing materials, or household vulnerabilities.
1. Test every year for total coliform bacteria and E. coli
Annual microbiological testing is one of the most important baseline actions for private well water safety. Total coliform bacteria are indicator organisms. Their presence does not always mean disease-causing pathogens are present, but it does signal that the well or plumbing system may be vulnerable to contamination. E. coli, by contrast, is a stronger indicator of fecal contamination and requires prompt attention.
Homeowners should test for:
- Total coliform
- E. coli or fecal coliform, depending on lab reporting format
If you want a deeper explanation of procedures and interpretation, see this guide on how to test bacteria in water.
2. Test every year for nitrate
Nitrate is one of the most significant groundwater contaminants in many rural areas. It is colorless, odorless, and tasteless, so laboratory testing is essential. Elevated nitrate often reflects fertilizer use, manure, septic influence, or other nitrogen inputs reaching groundwater. It is especially important in homes with infants, pregnant people, or shallow wells.
In the United States, the drinking water maximum contaminant level for nitrate is 10 mg/L as nitrogen (NO3-N), which is often equivalent to about 45 mg/L as nitrate (NO3-), depending on how the lab reports it. Homeowners must read the unit carefully. For a more focused overview, this article on testing nitrates in water is useful.
3. Check pH, hardness, alkalinity, and corrosivity indicators
These parameters are not always direct health threats, but they strongly influence plumbing performance and metal leaching potential.
- pH: Low pH can increase corrosivity and metal release from plumbing.
- Hardness: High calcium and magnesium contribute to scale buildup in heaters, fixtures, and appliances.
- Alkalinity: Helps buffer pH changes and affects water stability.
- Corrosivity indicators: May include chloride, sulfate, total dissolved solids, and sometimes a corrosion index evaluation.
These measurements help homeowners distinguish between a health-based contamination issue and a water chemistry issue that requires treatment for infrastructure protection.
4. Test for metals based on geology, plumbing, and age of the home
A broader well water analysis often includes metals such as arsenic, lead, copper, iron, manganese, and sometimes uranium. Not every home needs the same panel, but several conditions should trigger metal testing:
- Known regional arsenic or uranium occurrence
- Older plumbing or brass fixtures
- Blue-green stains, metallic taste, or corrosive water
- Black, orange, or brown staining suggesting iron or manganese
- Past mining, industrial, or waste disposal activities nearby
Important distinctions matter here. Iron and manganese are often more of an aesthetic and operational issue, though manganese at elevated levels can also raise health concerns. Lead and arsenic, by contrast, are more directly tied to health-based risk management.
5. Test after flooding, heavy rain, repairs, or changes in taste and odor
Routine annual testing is only the baseline. Additional groundwater testing is warranted when conditions change, including:
- Flooding near the wellhead
- Heavy rainfall after drought
- Well repair, pump replacement, or plumbing work
- Long periods of non-use
- Sudden cloudiness, sediment, or color changes
- New odor, taste, or staining
- Nearby contamination event, spill, or land-use change
- Recurrent gastrointestinal illness in the home, while recognizing many causes are possible
These events increase the likelihood that contaminants have entered the well or disturbed sediments in the system.
6. Consider location-specific contaminants
Every well sits in a different risk environment. A comprehensive checklist should ask what is unique about your setting.
- Near farmland: nitrate, pesticides, herbicides
- Near septic systems: bacteria, nitrate, chloride
- Near coastal zones: sodium, chloride, saltwater intrusion indicators
- Near mining or naturally mineralized geology: arsenic, uranium, metals
- Near fuel storage or industrial sites: volatile organic compounds
- Near areas with road deicing: sodium and chloride
If you are building a testing plan from scratch, browsing the broader water testing category can help identify parameter-specific resources relevant to your region and well type.
7. Use a certified laboratory whenever possible
Home test strips and kits can be useful for quick screening, trend monitoring, or preliminary troubleshooting, but critical health decisions should rely on a qualified laboratory. Certified labs use validated analytical methods, chain-of-custody procedures where relevant, and quality controls designed to reduce false results.
For bacteria, timing and sample handling are especially important. For metals and organics, proper preservation and container type are essential. Ask the lab whether it is state-certified or accredited for the analytes you need.
8. Sample correctly to avoid false reassurance or false alarms
Sampling errors are a major reason water results become confusing. If a homeowner contaminates a bacteria sample during collection, the lab may report a positive result that reflects poor technique rather than the well itself. On the other hand, if a sample is taken after filtration or from an unusual faucet, it may not represent actual drinking water exposure.
Best practices include:
- Follow the lab’s instructions exactly
- Use the container provided by the lab
- Do not rinse sterile bacteria bottles
- Sample from a clean indoor cold-water tap unless instructed otherwise
- Remove aerators if the lab recommends it
- Avoid touching the inside of the cap or bottle
- Deliver the sample to the lab within the required holding time
- Record the date, time, and sample location
9. Keep records over time
A single report is useful; a sequence of reports is much more powerful. Maintaining a well water file allows you to spot trends, such as rising nitrate, increasingly low pH, or recurring coliform detections after storms. Records are also valuable when selling a home, evaluating treatment systems, or discussing local hydrogeology with a county health department or water professional.
Good records should include:
- Laboratory reports
- Sampling dates and locations
- Treatment equipment maintenance logs
- Well construction details, if available
- Repair records
- Notes on flooding, drought, or nearby land-use changes
10. Have a plan for failed results
Testing only helps if there is a clear response pathway. Homeowners should know in advance what steps to take after a problematic result: confirmatory testing, immediate short-term protective measures, source investigation, shock disinfection if appropriate, plumbing evaluation, or installation of targeted treatment. When a report exceeds a health-based threshold or detects bacteria, consult a qualified lab, local health authority, or treatment professional promptly. This resource on what to do if your water test fails provides a practical framework for response.
How Often Should Homeowners Test Well Water?
Testing frequency depends on risk, history, and local recommendations, but the following schedule is a scientifically reasonable starting point for many households:
| Parameter | Suggested Frequency | Why It Matters |
|---|---|---|
| Total coliform and E. coli | At least annually; also after flooding, repairs, or contamination events | Identifies microbiological vulnerability and possible fecal contamination |
| Nitrate | At least annually; more often in agricultural areas or where levels are trending upward | Important health-based contaminant, especially for infants |
| pH, hardness, alkalinity, iron, manganese | Every 1 to 3 years or when symptoms appear | Assesses corrosivity, staining, scaling, and water usability |
| Arsenic, lead, uranium, fluoride, region-specific metals | Every few years or based on local risk and prior results | Tracks long-term health-related contaminants |
| VOCs, pesticides, PFAS, other specific contaminants | As indicated by land use, local advisories, spills, or site history | Targets contamination sources not covered by standard screening |
Some county health departments or extension services offer region-specific recommendations that may be more tailored than a general national checklist. Always compare your plan with local guidance when available.
How to Collect a Well Water Sample Properly
The quality of a well contamination test depends heavily on sample integrity. Homeowners should prepare before collection rather than improvising with household containers or random timing.
Step 1: Choose the right sampling point
For most household drinking water questions, use a cold-water tap that is used regularly for consumption and that is not downstream of special treatment unless the goal is to test treated water specifically. If you want to know what is entering the house, you may also need a raw water sample before treatment. Clarify this with the lab.
Step 2: Follow parameter-specific instructions
Bacteria samples require sterile containers and often should not be collected after disinfecting a faucet with bleach unless instructed to do so by the lab. Metal samples may require “first draw” sampling in some cases, especially when evaluating plumbing contribution, while other analyses may require a flushed sample. This is why generic sampling advice can be misleading; laboratory instructions for the exact test panel matter.
Step 3: Preserve and transport correctly
Some analytes require cooling, chemical preservatives, dark storage, or rapid transport. Missing the holding time can invalidate the result. Bacteria samples are especially time-sensitive.
Step 4: Avoid contamination during handling
Do not touch bottle openings, set caps on dirty surfaces, or sample from swinging hoses, outdoor spigots with poor sanitation, or taps with obvious debris unless those are the specific sources under investigation.
How to Interpret Common Well Water Test Results
Laboratory reports often overwhelm homeowners because they include units, detection limits, qualifiers, and regulatory references that are not self-explanatory. Interpretation starts with three questions:
- Is the contaminant detected?
- If detected, at what concentration and in what units?
- Is that concentration above a health-based, action-based, or aesthetic benchmark?
Bacteria results
Absent or not detected for total coliform and E. coli is generally the desired result. If total coliform is present but E. coli is absent, the system may be vulnerable or the sample may reflect localized contamination. If E. coli is detected, treat it as more urgent because it indicates fecal contamination risk.
Nitrate results
Check whether the result is reported as nitrate-nitrogen (NO3-N) or nitrate (NO3-). A concentration of 10 mg/L as nitrogen is not the same as 10 mg/L as nitrate. Misreading units is a common homeowner error.
Lead and copper
These metals may come from plumbing rather than the aquifer. Interpretation depends on the sampling protocol. A first-draw sample after water sits in pipes can capture household exposure potential more directly than a fully flushed sample.
Arsenic and uranium
These are often geology-related and may be stable over time, but concentrations can still vary. Because health considerations are long-term, repeat testing should still be part of the plan even if previous results were acceptable.
Iron and manganese
These often cause staining, sediment, metallic taste, and fouling of fixtures or treatment systems. They may also support nuisance growths such as iron bacteria. Aesthetic problems should not be dismissed, because they can signal changing aquifer or well conditions.
pH and corrosivity
Low pH and aggressive water increase the chance that plumbing materials release metals. Even if the raw groundwater is low in contaminants, corrosion can create an exposure problem at the tap.
Standards, Thresholds, and Regulatory Context
Private wells occupy a different regulatory position than public water systems. In many countries, including the United States, homeowners are responsible for their own testing and maintenance. Still, public drinking water standards remain highly useful as reference points for understanding health significance.
Important categories include:
- Maximum Contaminant Levels (MCLs): Enforceable standards for public water systems, often used as benchmarks for private wells.
- Action levels: Trigger points for response, such as those used in some lead programs.
- Secondary standards: Non-enforceable guidelines related to taste, odor, color, staining, or scaling rather than direct health effects.
- Health advisories or guideline values: Useful when no formal MCL applies or when additional toxicological guidance exists.
Homeowners should remember that “below a standard” does not always mean “ideal” in every context, especially for people with vulnerable health conditions, infants, or homes with complex plumbing corrosion issues. Conversely, a minor exceedance of an aesthetic guideline is not the same as a severe acute health emergency. The scientific meaning of the result depends on the contaminant.
Practical Response to Specific Problems
If bacteria are detected
Resample promptly as directed by the lab or local authority, inspect the wellhead, assess recent flooding or repairs, and evaluate whether shock chlorination or other corrective action is appropriate. Recurrent positives may indicate structural vulnerability rather than a one-time contamination event.
If nitrate is elevated
Confirm the result, investigate nearby nutrient sources, and avoid preparing infant formula with affected water if levels are at or above health-based thresholds. Point-of-use reverse osmosis or an alternative safe water source may be needed while the issue is addressed.
If lead or copper are elevated
Investigate plumbing materials and corrosivity. Flushing practices may reduce short-term exposure in some cases, but long-term control typically focuses on plumbing replacement or corrosion treatment.
If arsenic, uranium, or other geogenic contaminants are elevated
These usually require treatment designed for the specific contaminant, such as adsorption, reverse osmosis, anion exchange, or other validated technologies. Broad-purpose sediment filters alone do not solve these problems.
If water has odor, staining, or sediment
Test before choosing a treatment device. Hydrogen sulfide odor, iron staining, and turbidity can have multiple causes. Treatment should match the confirmed chemistry.
Choosing Between Lab Testing and Home Test Kits
Home kits can be useful for screening pH, hardness, chlorine, iron, nitrate, or other basic parameters, especially for routine monitoring or troubleshooting. However, they have limitations in precision, detection limits, and quality assurance. For contaminants with significant health implications, laboratory testing remains the better choice.
Use home kits when:
- You want a quick preliminary check
- You are tracking a known treatment system’s performance
- You need frequent trend observations between formal lab tests
Use a laboratory when:
- You need health-based decisions
- You are buying or selling a home
- You are responding to a contamination event
- You need bacteria, metals, organics, or legally defensible results
Seasonal and Event-Based Well Testing Considerations
Water quality can shift seasonally. Spring snowmelt and heavy rains may increase infiltration from the surface. Summer drought can concentrate some dissolved constituents or change pumping dynamics. Fall agricultural activity may influence nutrient movement. Winter freezing and reduced use can affect plumbing conditions. Testing at the same time each year creates comparable records, but event-based tests are equally important after unusual weather or repairs.
Homeowners should pay extra attention after:
- Wildfire impacts in the watershed or on the property
- Extended power outages affecting pumps and pressure systems
- Septic backups or drain field failures
- Long vacancy periods in seasonal homes
Well Construction and Site Protection Checklist
Good water quality starts before the sample bottle. A homeowner checklist should always include physical inspection and source protection, because testing alone cannot prevent contamination.
- Check that the well cap is secure and sanitary.
- Make sure the well casing extends adequately above grade according to local practice.
- Confirm the ground slopes away from the well to prevent ponding.
- Keep chemicals, fuel, manure, and waste away from the wellhead.
- Inspect for cracks, corrosion, or openings in the casing.
- Locate the septic system and verify adequate separation distances if records are available.
- Do not allow backflow risks from hoses, chemical sprayers, or cross-connections.
- Schedule professional inspection if the well is old, damaged, or repeatedly contaminated.
These preventive steps complement well water testing by reducing the chance of contamination entering the system in the first place.
FAQ
How often should well water be tested?
At minimum, most homeowners should test annually for total coliform bacteria, E. coli, and nitrate. Additional testing may be needed every 1 to 3 years for general chemistry and whenever flooding, repairs, or changes in water quality occur.
Can clear and good-tasting well water still be unsafe?
Yes. Many important contaminants, including nitrate, arsenic, and some bacteria-related risks, may not change the water’s taste, smell, or appearance. Laboratory testing is the reliable way to evaluate safety.
What is the most important first well contamination test?
For many homes, the first priorities are bacteria testing and nitrate testing, because these address common and important health-related groundwater concerns. After that, expand testing based on local geology, plumbing, and land use.
Should I use a home test kit or a certified lab?
Home kits are helpful for screening and routine checks, but a certified laboratory is better for health-based decisions, real estate transactions, and confirmation of contamination.
What if my well water test shows contamination?
Do not ignore it, but do not panic. Confirm the result if needed, identify whether the issue is microbial, chemical, or plumbing-related, and choose corrective action based on the specific contaminant and concentration.
Conclusion
A homeowner well is both a water source and a management responsibility. The most effective approach to well water testing is systematic rather than reactive: test annually for core contaminants, add targeted groundwater testing based on local risks, sample correctly, interpret results carefully, and keep good records over time. This checklist-based strategy supports stronger private well water safety, helps detect contamination before it becomes a larger problem, and gives homeowners a rational basis for treatment, maintenance, or further investigation. In short, consistent and informed well water analysis is one of the most important steps in protecting the quality of drinking water from a private well.
Read the full guide: Water Testing Guide
Explore more in this category: Water Testing Articles