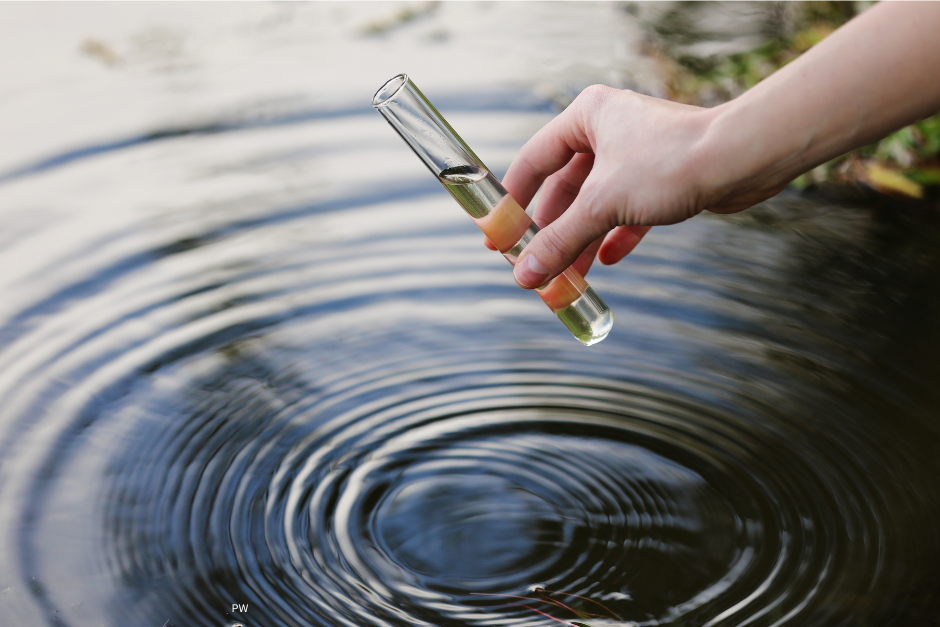
DIY water testing methods can help households identify common drinking water problems, track changes after plumbing repairs, check private wells, and decide whether more advanced laboratory testing is needed. A home test cannot replace a certified laboratory for legal compliance, real estate transfers, or high-risk contamination events, but it can provide useful screening information when it is used carefully.
Water quality is not a single measurement. Safe drinking water depends on microbiological safety, chemical composition, physical clarity, taste, odor, plumbing materials, source water, treatment, storage, and distribution. A glass of water may look clear while containing nitrate, lead, arsenic, volatile chemicals, or disease-causing microorganisms. Another sample may taste unpleasant because of harmless minerals. Good testing begins with knowing what each method can and cannot tell you.
This complete guide explains practical DIY water testing methods for homes, private wells, emergency use, and routine monitoring. It covers test strips, colorimetric kits, digital meters, bacteria presence or absence tests, visual inspection, sample collection, interpretation, and decisions about purification methods. For a broader scientific framework, see the PureWaterAtlas Water Testing Guide, which explains professional analysis, sampling plans, and laboratory parameters in greater depth.
What DIY Water Testing Can and Cannot Do
DIY water testing is best understood as screening. It can reveal whether certain parameters are likely high, low, present, absent, changing, or stable. This is valuable because many water problems develop gradually. A private well can change after heavy rainfall. Chlorine residual can decline in stored water. pH can shift after treatment. Hardness can rise seasonally. A filter can stop removing contaminants once its capacity is exhausted.
Home testing is useful for common field measurements such as pH, free chlorine, total chlorine, hardness, alkalinity, total dissolved solids, electrical conductivity, iron, copper, nitrate, nitrite, and sometimes bacteria indicators. It is less reliable for contaminants that require highly sensitive instruments, strict preservation, or specialized methods. Examples include lead at low health-based concentrations, arsenic, mercury, PFAS, pesticides, petroleum solvents, disinfection byproducts, radionuclides, and many industrial chemicals.
Public health agencies emphasize that drinking water safety depends on source protection, treatment, distribution control, and testing. The WHO drinking water overview notes that contaminated water can transmit diseases and expose people to harmful chemicals. The EPA drinking water resources explain regulated contaminants, public water system responsibilities, and consumer information for the United States. These references are useful because they distinguish between screening tests and enforceable laboratory methods.
A good rule is simple: use DIY water testing methods to detect problems, compare trends, and guide immediate decisions, but use certified laboratory testing when results affect health, property, compliance, infants, pregnancy, immune-compromised people, or treatment system design.
Start With the Water Source and Risk Profile
The best test kit is the one matched to the water source. Public water, private wells, rainwater, stored emergency water, recreational water, and water after home treatment each have different risks. Testing everything is rarely practical. Testing the wrong parameters can create false confidence.
Public water supplies
Public water systems are routinely monitored under regulatory programs, but household plumbing can still affect water quality. Common DIY checks include free chlorine, pH, hardness, copper, lead screening, taste and odor clues, and total dissolved solids. If your water suddenly changes color, smell, or pressure, contact the utility and check local notices before relying on home treatment.
Private wells
Private well owners are usually responsible for their own water safety. Useful routine tests include bacteria, nitrate, nitrite, pH, conductivity, hardness, iron, manganese, and sometimes arsenic, fluoride, uranium, or radon depending on local geology. A DIY kit may be helpful between laboratory tests, but a private well should be tested by a certified laboratory after flooding, repairs, new construction nearby, septic failure, unexplained illness, or any major change in water appearance.
Stored water and emergency water
Stored water can lose disinfectant residual and become contaminated during handling. DIY testing can check free chlorine, pH, turbidity, and sometimes bacterial indicators. In an emergency, water that appears clear can still require disinfection or boiling. Testing should support, not replace, official boil water advisories and emergency guidance.
Treated water at home
Home filters and purification methods should be verified. A reverse osmosis system can be checked with conductivity or total dissolved solids, although those measurements do not prove removal of every contaminant. Activated carbon filters may improve chlorine taste but require specific testing for contaminants such as lead, VOCs, or PFAS if those are the reason for installation. UV systems need turbidity control, lamp maintenance, and microbiological testing rather than just a visual check.
Core DIY Water Testing Methods
DIY water testing methods fall into several categories. Each has strengths and limitations. For best results, combine methods instead of relying on a single number.
Visual inspection
Visual inspection is the simplest test, but it must be used cautiously. Cloudiness may indicate air bubbles, suspended sediment, corrosion, microbial growth, or treatment failure. Red, brown, black, green, or blue staining can suggest iron, manganese, copper corrosion, algae, or plumbing reactions. Oily films may come from natural organic matter, petroleum, or plumbing residues. White scale usually indicates hardness minerals.
Visual findings are clues, not proof. Clear water may be unsafe, and colored water may be mostly aesthetic. Still, recording appearance in a clean glass against a white background is a good first step. Let the sample stand for several minutes. If cloudiness clears from the bottom upward, air is often involved. If particles settle, sediment may be present. If color remains, dissolved metals or organic compounds may be more likely.
Smell and taste observations
Odor can help identify issues such as chlorine, sulfur, mustiness, fuel, solvents, or metallic notes. Do not taste water that may be chemically contaminated, sewage-affected, or subject to a boil water advisory. Hydrogen sulfide can produce a rotten egg smell. Chlorine or chloramine can smell medicinal. Musty odors may relate to algae metabolites or biofilms. Fuel or solvent odors require immediate caution and professional testing.
Smell observations should be recorded at cold and hot taps. If odor occurs only in hot water, the water heater, anode rod, or temperature conditions may be involved. If odor occurs at all taps, source water or distribution water is more likely.
Test strips
Test strips are inexpensive and fast. A strip contains reagent pads that change color when dipped into water. Common strip parameters include pH, hardness, alkalinity, chlorine, nitrate, nitrite, iron, copper, and sometimes lead screening. Strips are useful for trends and rough ranges, but they are vulnerable to timing errors, lighting, wet fingers, expired reagents, and subjective color matching.
For better accuracy, use fresh strips, store them dry, follow immersion time exactly, shake off excess water as instructed, read results at the specified time, and compare under bright natural or white light. Do not interpret a strip after the recommended window because colors can keep changing.
Colorimetric drop or powder kits
Colorimetric kits use liquid drops, tablets, or powder packets to create a color reaction in a measured sample volume. Many pool, aquarium, and drinking water kits use this approach. They can be more consistent than strips when the instructions are followed carefully. Chlorine, pH, hardness, alkalinity, iron, copper, phosphate, nitrate, and other parameters are often available.
The main limitations are reagent age, sample volume errors, color perception, and interferences. Some tests require waiting periods or multiple steps. Use clean sample cells, rinse them with the water being tested, and avoid touching the inside surfaces. If a kit includes a color comparator, hold it against a white background and read it in consistent light.
Digital meters
Digital meters can measure pH, electrical conductivity, total dissolved solids estimate, oxidation-reduction potential, temperature, and sometimes dissolved oxygen or turbidity. Meters look precise because they display numbers, but precision is not the same as accuracy. A poorly calibrated pH meter can be less useful than a good colorimetric test.
Calibration is essential. pH meters require buffer solutions, usually pH 4, 7, and sometimes 10. Conductivity meters require calibration standards. Electrodes must be stored properly and replaced when they deteriorate. Rinse probes between samples and avoid measuring very hot, very cold, oily, or dirty samples unless the instrument is designed for them.
Presence or absence bacteria tests
Many DIY bacteria tests screen for total coliforms, E. coli, or general bacterial growth using a bottle, powder, or paddle system. Some change color after incubation. These tests can be useful for private well surveillance or post-disinfection checks, but they are not equivalent to certified microbiological analysis unless the kit and procedure meet recognized standards.
Bacteria testing requires careful sampling. The inside of the bottle and cap must remain sterile. Do not touch the rim or inside of the cap. Avoid sampling from hoses, swivel faucets, aerators, or taps with leaks unless the goal is to test that exact outlet. Follow incubation temperature and time requirements. A positive result should be treated seriously, especially for wells and untreated water.
Key Parameters You Can Test at Home
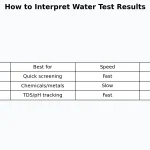
The table below summarizes common DIY water testing methods, what they indicate, and when a laboratory should be used. Values and action levels vary by jurisdiction and health context, so interpret results against local standards and expert advice.
| Parameter | Common DIY method | What it can indicate | When to use a certified lab |
|---|---|---|---|
| pH | Strips, drops, digital pH meter | Corrosion tendency, treatment performance, taste, compatibility with disinfection | If designing treatment or investigating corrosion, lead, or copper release |
| Free chlorine | DPD drops, strips, colorimeter | Disinfectant residual in public or stored water | If illness, distribution contamination, or compliance questions are involved |
| Hardness | Strips, titration drops | Scale formation, soap performance, softener function | If sizing a softener or documenting treatment performance |
| Nitrate and nitrite | Strips, colorimetric kit | Fertilizer, septic, animal waste, or natural nitrogen contamination | Always confirm elevated results, especially for infants or pregnancy |
| Iron and manganese | Strips, colorimetric kits | Staining, taste, sediment, well chemistry | If selecting oxidation, filtration, or well treatment |
| Lead | Screening kit | Possible plumbing-related contamination | Use lab testing for any health decision because low levels matter |
| Total dissolved solids | TDS or conductivity meter | General dissolved mineral content and RO performance trend | If identifying specific contaminants or diagnosing health concerns |
| Total coliform and E. coli | Presence or absence bacteria test | Possible fecal or environmental microbial contamination | Confirm positives and use lab testing for well safety decisions |
How to Collect a Water Sample Correctly
Sampling mistakes are one of the largest causes of misleading home water test results. A sample is only meaningful if it represents the water you intend to evaluate. Before opening a kit, decide the question. Are you testing source water, treated water, first-draw plumbing water, flushed water, hot water, cold water, stored water, or water from a specific filter?
Choose the right tap
For general drinking water, sample from a cold-water kitchen or primary drinking tap. Avoid hoses, outdoor taps, bathroom taps, filtered refrigerator dispensers, or hot water unless those are specifically the target. Remove aerators only if the test instructions require it. For microbiological testing, many protocols recommend removing or disinfecting the faucet outlet and allowing water to run before sampling, but specific instructions vary by kit and laboratory.
First-draw versus flushed samples
A first-draw sample is collected after water has been sitting in plumbing, often for at least six hours. This is useful for investigating lead, copper, or other plumbing-related metals. A flushed sample is collected after running water for a set period, often to represent water from the service line, well, or distribution system rather than water that sat in household pipes. Mixing these approaches can make results hard to interpret.
Use clean containers
For non-sterile tests such as pH, hardness, or conductivity, a clean glass or plastic container may be adequate if rinsed with sample water. For bacteria tests, only use the sterile container provided. For chlorine testing, test immediately because chlorine residual can decline after collection. For volatile odors, collect carefully and avoid vigorous shaking unless instructed.
Record time, location, and conditions
Write down the date, time, tap, weather, recent plumbing work, filter age, water softener status, and any unusual events such as flooding or hydrant flushing. The notes are often as valuable as the reading. If you test regularly, trends become easier to see.
Step-by-Step DIY Testing Plan for Households
A household testing plan should be systematic rather than random. The following approach works for many homes and can be adjusted for local risk.
- Identify the source. Determine whether your drinking water comes from a public supply, private well, rainwater system, hauled water, or another source.
- Review known information. Public water customers can read the annual consumer confidence report if available. Well owners can review past lab results, local geology, and nearby land use.
- Inspect the plumbing and treatment equipment. Note pipe materials, age of the home, filters, softeners, UV units, reverse osmosis systems, and storage tanks.
- Choose screening tests based on risk. Do not rely on a large kit with many low-quality pads if your main concern requires a specific lab method.
- Collect samples consistently. Use the same tap, same flushing time, and same testing procedure when comparing trends.
- Confirm significant or surprising results. Repeat the test, check the expiration date, and consider a certified laboratory if the result affects health decisions.
- Match treatment to confirmed contaminants. Do not install a system based only on taste, marketing claims, or one unclear strip result.
For readers comparing home screening with professional analysis, the PureWaterAtlas Water Testing section includes additional guides on sampling, contaminants, and interpretation.
Testing for Microbiological Safety
Microbiological contamination is one of the most urgent water safety concerns because it can cause acute illness. Bacteria, viruses, and protozoa may enter drinking water through sewage, animal waste, surface water intrusion, floodwater, damaged wells, cross-connections, or treatment failure. DIY bacteria tests usually focus on indicator organisms rather than every pathogen.
Total coliform bacteria indicate that environmental organisms can enter the water system. E. coli is a stronger warning sign of fecal contamination. A negative coliform result reduces concern but does not prove that all pathogens are absent, especially if sampling was poor or contamination is intermittent. A positive E. coli result in drinking water should be treated as a serious public health issue.
Private wells should be tested after flooding, pump replacement, well cap damage, nearby septic problems, or unexplained gastrointestinal illness. If bacteria are detected, short-term protective measures may include boiling, using bottled water, or applying verified disinfection under expert guidance. Long-term correction may require well inspection, shock chlorination, sanitary repairs, source protection, or treatment such as UV disinfection combined with sediment filtration.
Microbial risks are covered in more detail in PureWaterAtlas resources on Water Microbiology. That topic is especially relevant for households using wells, springs, cisterns, rainwater tanks, or emergency water supplies.
Testing for Lead, Copper, and Plumbing Metals
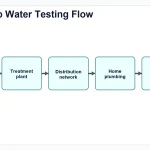
Lead and copper are different from many source-water contaminants because they often enter water from plumbing. Lead can come from old service lines, lead solder, brass fixtures, or galvanized pipe that has accumulated lead. Copper can leach from copper pipes, especially when water is acidic or corrosive. A water utility may deliver water that meets standards at the treatment plant while a home still has elevated metals at the tap.
DIY lead tests can provide a warning, but they are not sensitive or reliable enough for full health assessment. Lead is harmful at very low levels, particularly for infants, children, and pregnant people. If lead is suspected, use a certified laboratory method with proper first-draw sampling. Do not use a home kit result as the only basis for deciding that water is safe.
pH, alkalinity, hardness, chloride, sulfate, dissolved inorganic carbon, and corrosion control chemistry all affect metal release. DIY tests can help identify corrosive tendencies, but corrosion is complex. If blue-green stains appear, copper may be elevated. If water from older plumbing has a metallic taste or if the building has lead service lines, laboratory testing is the responsible choice.
Practical precautions include using cold water for drinking and cooking, flushing stagnant water when appropriate, replacing certified filters on schedule, and choosing filters certified for lead reduction when lead is confirmed or likely. Boiling does not remove lead and can concentrate it slightly as water evaporates.
Testing for Nitrate, Nitrite, and Agricultural Influence
Nitrate and nitrite are common concerns for private wells in agricultural areas, near septic systems, or where fertilizer and animal waste can affect groundwater. Nitrate is particularly important for infants because high levels can interfere with oxygen transport in the blood. Pregnant people and some medically vulnerable individuals may also require caution.
DIY nitrate strips are widely available, but color matching can be difficult. Nitrite can interfere with some tests, and results may vary with storage and timing. If a home test suggests elevated nitrate or nitrite, confirm with a certified laboratory, especially before preparing infant formula or making long-term treatment decisions.
Nitrate is not removed by boiling. In fact, boiling can increase nitrate concentration because water evaporates while nitrate remains. Appropriate treatment may include reverse osmosis, distillation, or ion exchange designed and maintained for nitrate removal. Activated carbon pitchers generally do not remove nitrate effectively unless specifically designed and certified for that purpose.
Testing for pH, Hardness, Alkalinity, and Corrosion Conditions
pH measures how acidic or basic water is. It affects taste, corrosion, disinfection, and treatment performance. Low pH can increase corrosion of metals. High pH can reduce chlorine effectiveness and contribute to scale. Most drinking water falls near neutral to moderately alkaline, but wells can vary widely depending on geology.
Hardness is mainly caused by calcium and magnesium. Hard water is usually not a health hazard, but it causes scale in kettles, heaters, fixtures, and appliances. It can reduce soap performance and affect treatment equipment. A hardness test is useful before selecting a softener or evaluating whether a softener is functioning.
Alkalinity is the water’s ability to neutralize acid. It acts as a buffer and helps stabilize pH. Water with low alkalinity may experience larger pH swings and be more corrosive. Water with high alkalinity may contribute to scaling and require special treatment considerations.
These parameters are well suited to DIY water testing methods. Strips can provide a rough range, while titration kits can give better resolution. Digital pH meters can be useful if calibrated. When corrosion, lead, copper, or treatment system design is involved, laboratory testing and professional interpretation are recommended.
Testing Chlorine and Disinfectant Residual
Free chlorine and total chlorine tests are valuable for public water, stored water, rainwater systems, and emergency disinfection. Free chlorine is the portion available for disinfection. Total chlorine includes free chlorine plus combined chlorine. In systems using chloramine, interpretation differs from systems using free chlorine.
DPD colorimetric tests are common and usually better than vague odor impressions. A chlorine smell does not reliably indicate safe residual, and the absence of smell does not prove the water lacks disinfectant. Chlorine residual can decline in storage containers, hot environments, old plumbing, activated carbon filters, and water with high organic matter.
If you disinfect water at home, test residual after the required contact time. Also consider turbidity and temperature, because cloudy or cold water can reduce disinfection effectiveness. Chlorine is not equally effective against all organisms; some protozoan cysts are resistant. For uncertain microbial contamination, follow official emergency guidance and consider boiling where advised.
Using TDS and Conductivity Meters Wisely
Total dissolved solids meters are popular because they are inexpensive and produce an instant number. Most TDS meters actually measure electrical conductivity and convert it to an estimated dissolved solids value using a factor. This is useful for general mineral content and for monitoring reverse osmosis performance, but it does not identify which substances are present.
Low TDS does not automatically mean safe water. Lead, pesticides, solvents, PFAS, or pathogens may be present at harmful levels without greatly changing conductivity. High TDS does not automatically mean unsafe water. Calcium, magnesium, sodium, bicarbonate, chloride, and sulfate can all contribute to TDS, with different health and taste implications.
A TDS meter is most useful as a trend tool. If feed water is 400 mg/L estimated TDS and reverse osmosis product water rises from 20 to 120 mg/L over time, the membrane or seals may need evaluation. If a well’s conductivity suddenly changes after heavy rainfall, that may signal surface water influence or changing groundwater chemistry. To understand the chemistry behind the number, laboratory ion analysis is needed. The USGS Water Science School provides helpful background on water properties, minerals, and hydrologic processes.
Testing Water Before and After Treatment
Many households install filters before knowing exactly what is in the water. This can lead to the wrong technology, wasted money, and unsafe assumptions. Testing should occur before treatment to identify the problem and after treatment to verify performance.
Different purification methods target different contaminants. Activated carbon can reduce chlorine, taste, odor, and many organic chemicals, but performance depends on carbon type, contact time, contaminant concentration, and filter certification. Reverse osmosis can reduce many dissolved ions and some metals, but it requires maintenance and may not address all volatile compounds or microbes without additional barriers. UV disinfection can inactivate many microorganisms, but only if water is clear enough and the lamp dose is adequate. Water softeners reduce hardness but do not make contaminated water safe.
If you are selecting equipment, compare test results with technology capabilities rather than relying on broad claims. PureWaterAtlas has a detailed guide to Water Treatment Systems that explains how different treatment barriers match specific contaminants.
After installation, establish a baseline. Test raw water and treated water on the same day when possible. Record flow rate, filter age, pressure, and maintenance status. Repeat testing according to the contaminant risk. For high-risk contaminants such as arsenic, nitrate, lead, or bacteria, do not rely only on taste or a TDS meter to judge treatment performance.
Common Mistakes in DIY Water Testing
Many home water tests fail because of preventable errors. The most common mistake is using an all-in-one kit without understanding detection limits. A strip that says lead is not detected may not be sensitive enough to meet health-based goals. Another common mistake is reading color pads too late. A strip read after five minutes may show a different result than the manufacturer intended at thirty seconds.
Expired reagents are another problem. Heat, humidity, sunlight, and repeated opening can degrade strips and powders. Store kits in a cool, dry place and check expiration dates. Do not mix reagents from different kits unless the manufacturer allows it.
Sampling from the wrong location can also mislead. A refrigerator filter sample does not represent the whole home. A hot water sample does not represent cold drinking water. A hose sample may reflect hose materials rather than the well. A first-draw sample and a flushed sample answer different questions.
Some people overinterpret single results. Water quality can vary. If a result is surprising, repeat the test with a fresh sample and, if possible, a different method. If the result has health implications, confirm with a certified lab. Home testing should reduce uncertainty, not create false certainty.
When DIY Results Require Immediate Action
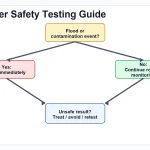
Certain findings deserve prompt attention. If a bacteria test is positive for E. coli, stop using the water for drinking and food preparation until appropriate protective measures and confirmatory testing are completed. If water has a fuel, solvent, sewage, or strong chemical odor, avoid consumption and seek official guidance. If nitrate screening is elevated in a household with infants or pregnant people, use an alternative safe water source and confirm by laboratory testing.
If lead is suspected because of old plumbing, known lead service lines, or a positive screening result, use certified filtration or alternative water while arranging proper testing. If water turns suddenly cloudy, discolored, or foul-smelling after flooding, main breaks, construction, or well disturbance, treat it as potentially unsafe until evaluated.
For public water customers, check utility alerts and local health department notices. For private wells, inspect the wellhead, cap, casing, drainage, nearby septic systems, and any recent land disturbance. Do not pour disinfectants or chemicals into wells without proper guidance, because incorrect shock chlorination can damage equipment, fail to solve the problem, or create unsafe conditions.
Interpreting Results Without Overconfidence
Interpreting DIY water testing methods requires context. A number is only meaningful when you know the method, detection range, sampling procedure, and health benchmark. For example, pH of 6.4 may be a corrosion concern but not a direct toxin. Hardness of 250 mg/L as calcium carbonate may cause scale but is not usually a health emergency. Nitrate near a health limit is more serious, especially for infants. A positive E. coli test is urgent even if the water looks clear.
Use results in layers. First, decide whether there is an immediate safety concern. Second, decide whether the result needs confirmation. Third, identify the likely source or mechanism. Fourth, choose treatment or corrective action based on confirmed data. Fifth, retest after changes.
Water chemistry also interacts. Low pH can worsen metal corrosion. High iron can interfere with treatment. Turbidity can shield microbes from disinfection. Organic matter can consume chlorine. Hardness can scale UV sleeves and reduce effectiveness. This is why water testing and purification methods should be considered together rather than as separate topics. For foundational concepts in contaminants, treatment, and water quality, see the PureWaterAtlas guide to Water Science.
A Practical DIY Testing Schedule
Testing frequency depends on source and risk. Public water customers may only need occasional household checks unless plumbing, taste, odor, or treatment concerns arise. Private wells need more regular attention. Treatment systems require verification after installation and maintenance.
| Situation | Suggested DIY checks | Suggested lab testing |
|---|---|---|
| Public water with no known issue | Chlorine, pH, hardness, taste and odor observations once or twice per year | Lead or copper if old plumbing is present; other tests if advised by local reports |
| Private well | pH, conductivity, hardness, nitrate screening, visual inspection several times per year | At least annual bacteria and nitrate; broader chemistry based on local geology |
| After flooding or well repair | Visual inspection, chlorine if disinfected, basic chemistry after stabilization | Bacteria and relevant contaminants before returning to normal use |
| Reverse osmosis system | TDS or conductivity monthly or quarterly; check pressure and flow | Contaminant-specific testing if treating nitrate, arsenic, lead, or other health risks |
| Activated carbon filter | Chlorine before and after filter if chlorine removal is the goal | Specific contaminant testing for lead, VOCs, PFAS, or pesticides if relevant |
| UV disinfection | Turbidity or clarity checks, lamp status, maintenance records | Bacteria testing after installation and periodically during use |
This schedule is a starting point, not a universal rule. Local geology, building age, nearby agriculture, industrial activity, septic density, and household health needs can all change the appropriate plan.
Choosing a DIY Water Testing Kit
When selecting a kit, look beyond the number of tests advertised on the package. A kit with fewer well-designed tests may be more useful than a large panel with vague ranges. Check the detection range, units, expiration date, sample instructions, interferences, and whether results are compared with recognized drinking water benchmarks.
For bacteria, choose a kit that clearly states which organisms it detects, incubation time, temperature requirements, and interpretation criteria. For chlorine, DPD methods are generally preferred for routine residual testing. For pH, a meter is useful only if you are willing to calibrate and maintain it. For nitrate, use screening as an early warning and confirm important results.
Be cautious with marketing language that promises complete safety from a simple strip. No single DIY kit can test for all possible contaminants. If your concern is arsenic, PFAS, pesticides, solvents, radionuclides, or very low-level lead, start with a laboratory or a kit specifically designed for that contaminant with appropriate sensitivity.
Cost should be weighed against consequence. For low-risk aesthetic parameters, inexpensive home tests may be sufficient. For infant drinking water, private wells, or suspected contamination, laboratory testing is often the better investment.
How DIY Testing Supports Better Purification Decisions
Testing and treatment should form a feedback loop. First, test to identify the problem. Then choose a treatment method matched to the contaminant. After installation, test again to verify performance. Continue periodic monitoring because filters age, membranes foul, lamps weaken, and source water changes.
For example, if water has high hardness but no health contaminants, a softener may protect plumbing and appliances. If nitrate is elevated, a softener is not the answer; reverse osmosis, distillation, or specialized ion exchange may be needed. If bacteria are present, activated carbon alone can make the problem worse by removing disinfectant and providing surfaces for microbial growth. If chlorine taste is the only complaint, a certified carbon filter may be enough.
Wastewater, septic systems, and watershed conditions can influence drinking water sources, especially private wells and small supplies. Understanding the Wastewater Treatment Process can help explain why septic setbacks, drainage, and nutrient control matter for groundwater protection.
The safest purification plan is contaminant-specific. Avoid treating water blindly. A treatment device should have documentation for the contaminant of concern, be installed correctly, and be maintained on schedule. Testing verifies that the device is doing what it is supposed to do.
Building a Reliable Home Water Testing Record
A single test is a snapshot. A record is a safety tool. Keep a water testing log with dates, locations, results, kit brands, lot numbers, expiration dates, weather, treatment maintenance, and observations. For digital meters, record calibration dates and standards used. For filters, record cartridge changes and water pressure changes.
Trends can reveal problems before they become obvious. Rising conductivity in a well may suggest changing groundwater influence. Increasing treated-water TDS from a reverse osmosis unit may indicate membrane decline. Recurrent coliform positives after well disinfection suggest a structural or source problem. Declining chlorine residual in stored water may show that containers need cleaning or rotation.
Photos can help document color, sediment, staining, and test strip readings, but do not rely on phone cameras for precise color interpretation. Lighting and camera processing can distort colors. Use photos as supporting notes, not primary measurements.
If you later consult a laboratory, health department, plumber, hydrogeologist, or treatment professional, your records will make the discussion more productive. Good records reduce guesswork and help distinguish isolated errors from real changes.
FAQ
Are DIY water testing methods accurate?
They can be accurate enough for screening when the kit is appropriate, fresh, and used exactly as instructed. Accuracy varies by parameter. pH, chlorine, hardness, and conductivity can be measured reasonably well at home. Lead, arsenic, PFAS, pesticides, and many trace contaminants usually require certified laboratory testing for reliable health decisions.
What is the best DIY water test for a private well?
For routine screening, private well owners often benefit from bacteria, nitrate, nitrite, pH, conductivity or TDS, hardness, iron, and manganese checks. However, annual laboratory testing for bacteria and nitrate is strongly recommended, with additional lab tests based on local geology and nearby land use.
Can a TDS meter tell me if water is safe?
No. A TDS meter estimates dissolved mineral content from electrical conductivity. It cannot identify pathogens, lead, pesticides, PFAS, solvents, or many other contaminants. It is useful for tracking mineral changes and reverse osmosis performance, but it does not prove water safety.
Should I test water before or after a filter?
Both are useful. Testing before treatment identifies the problem and helps select the right purification method. Testing after treatment verifies whether the system is working. For health-related contaminants, use contaminant-specific testing rather than relying only on taste, odor, or TDS.
How often should I test my drinking water at home?
Public water customers may test occasionally for household concerns such as chlorine, pH, hardness, and plumbing metals. Private well owners should test more often, including at least annual laboratory checks for bacteria and nitrate. Test after flooding, well repairs, plumbing changes, unexplained illness, or sudden changes in water taste, odor, or appearance.
Can DIY tests detect bacteria in drinking water?
Some DIY kits can screen for total coliforms, E. coli, or general bacterial growth. They are useful warning tools, but sampling must be sterile and instructions must be followed closely. Positive results should be treated seriously and confirmed through appropriate laboratory testing, especially for wells or untreated water.
Does boiling water remove chemicals detected by home tests?
Boiling can inactivate many microorganisms, but it does not remove most dissolved chemicals such as nitrate, lead, arsenic, or salts. Boiling can concentrate some contaminants as water evaporates. Use treatment methods matched to the confirmed contaminant.
What should I do if a DIY test shows unsafe water?
Repeat the test if there is any chance of user error, but take protective action immediately if the result suggests E. coli, high nitrate for infants, fuel or sewage contamination, or lead exposure. Use an alternative safe water source, contact local authorities or a qualified professional, and arrange certified laboratory confirmation when health decisions are involved.
Read the full guide: Water Testing Guide
Explore more in this category: Water Testing Articles